Add Comments
This guide will show the process of adding comments to docx document using unioffice.
An example code from the unioffice-examples repository will be used for this explanation.
But before that, the Before You Begin section will show you how to set up your environment and be ready to follow along this guide.
Before you begin
You should get your API key from your UniCloud account.
If this is your first time using UniOffice SDK, follow this guide to set up a local development environment.
Clone the project repository
In your terminal, clone the examples repository. It contains the Go code we will be using for this guide.
git clone https://github.com/unidoc/unioffice-examples
Navigate to the path document/comment/ folder in the unioffice-examples directory.
cd unioffice-examples/document/comment/
How it works
The code starts by importing the necessary dependencies in the import section, specifically in lines 9-15. The the API license key is set in the init function defined in lines 17-23.
The main function is defined in lines 25-65. In line 26, a new document is created using document.New(). Then in line 29 a new paragraph is instantiated. A comment is then added to the paragraph using para.AddComment(). After adding a new run to the paragraph, the comment associated with the paragraph is closed in line 39. After the comment is closed a new run is added to the paragraph which makes the added run with out comment. A new comment is instantiated in line 51. Then a couple of runs that contain this comment are added in lines 53-59. In line 62 the comment is closed and in line 63 the document is saved to file using doc.SaveToFile("simple_doc_with_comment.docx").
Run the code
Use the command below to run the code.
go run main.go
Sample output
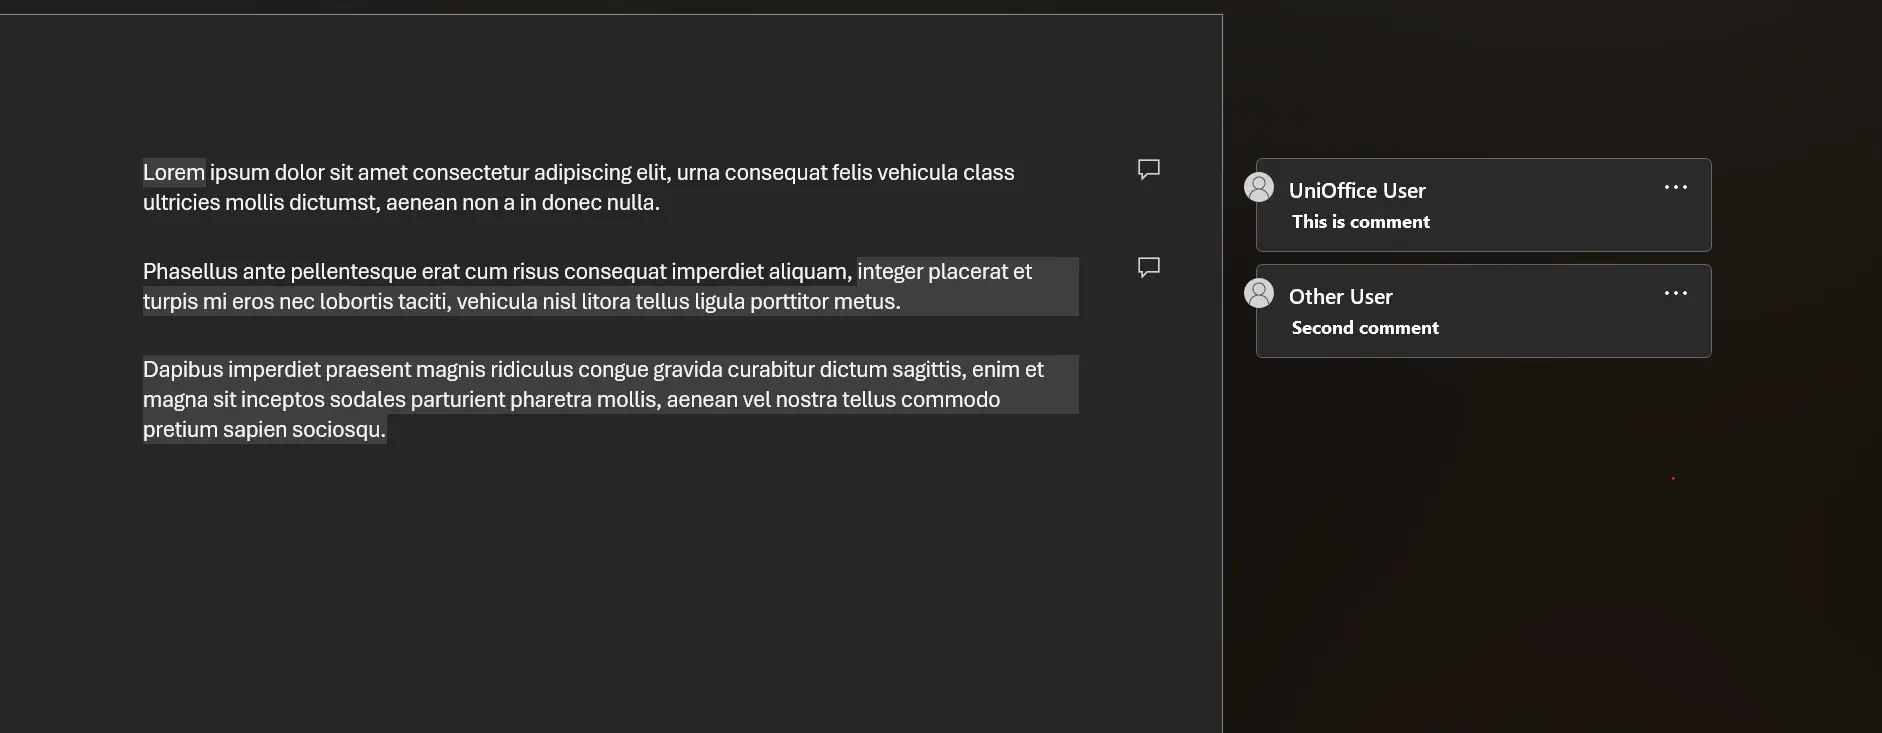
The document generated by the example code should look like as follows.