Adding Style to Paragraphs
This guide will teach you how to create a custom style to use in the paragraphs of your choice.
Before you begin
You should get your API key from your UniCloud account.
If this is your first time using UniOffice SDK, follow this guide to set up a local development environment.
Clone the project repository
In your terminal, clone the examples repository. It contains the Go code we will be using for this guide.
git clone https://github.com/unidoc/unioffice-examples
Navigate to the path document/paragraph-style folder in the unioffice-examples directory.
cd unioffice-examples/document/paragraph-style/
How it works
Lines 4-11 import the UniOffice packages and other required dependencies.
The init function in lines 13-20 authenticates your request with your UNIDOC_LICENSE_API_KEY.
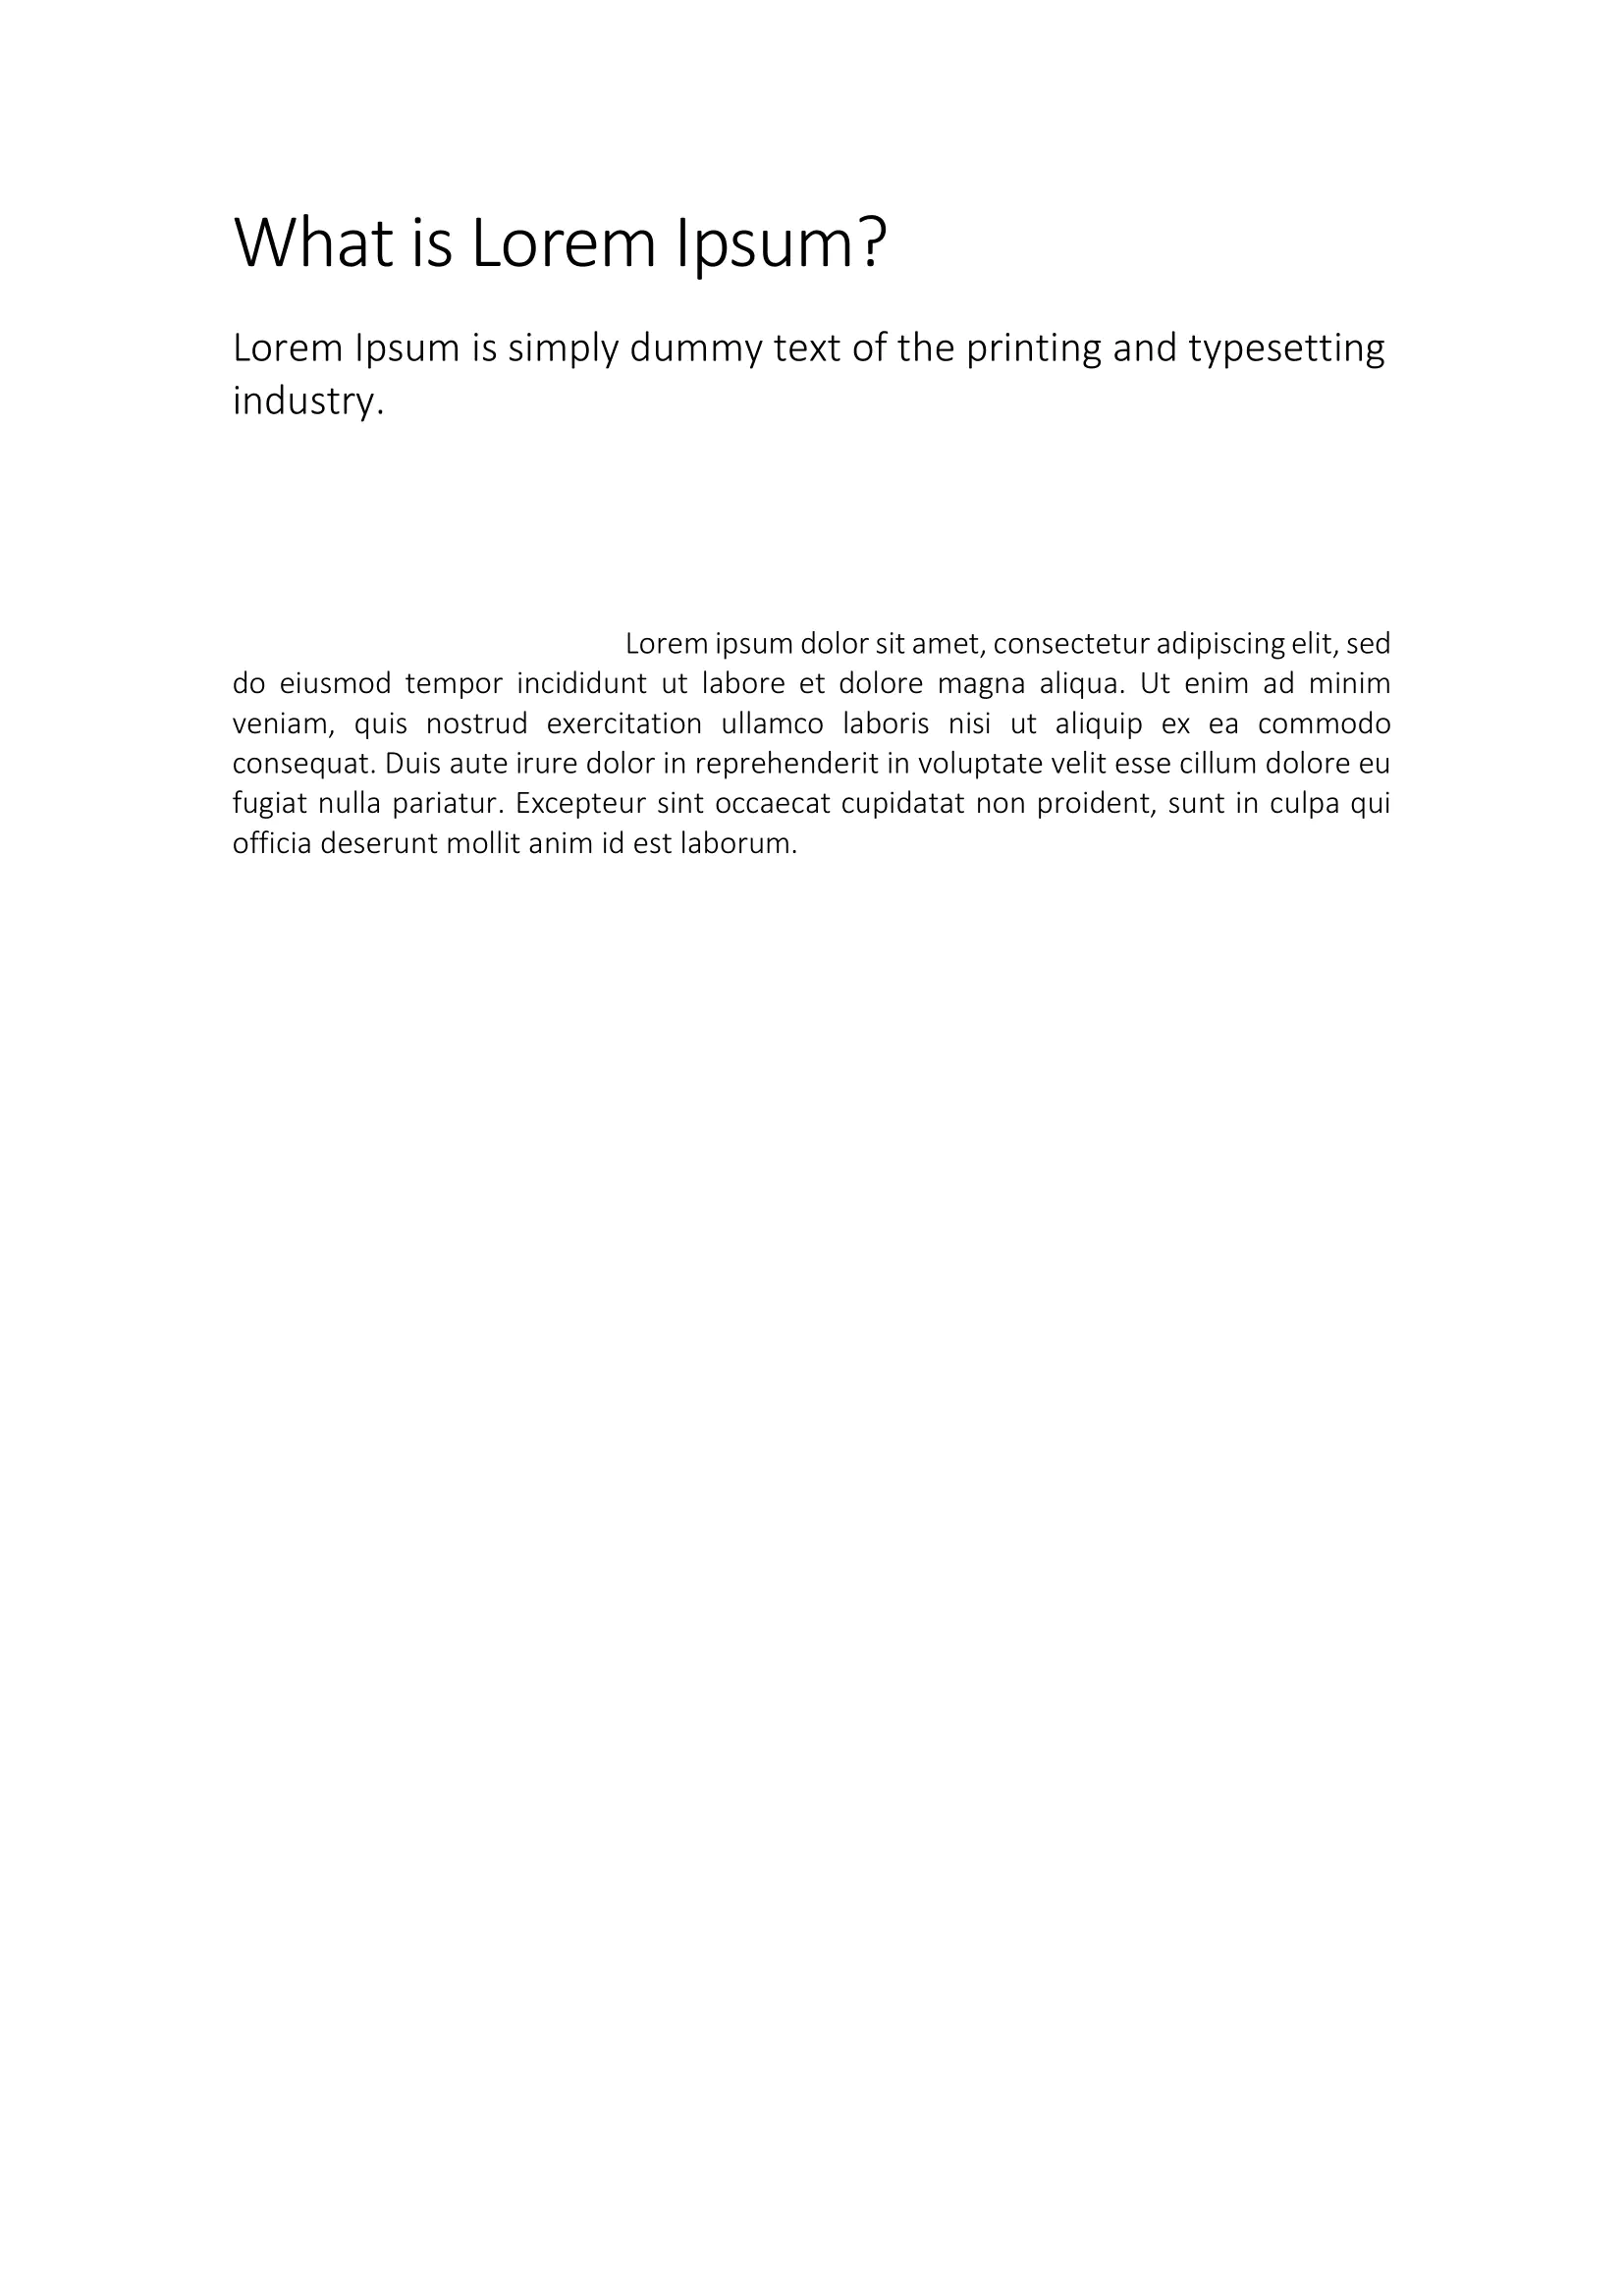
In the main function, spanning from line 22 to 56, a new document is created along with two paragraphs, one styled as Title and the other as Heading1. Each of these paragraphs is assigned a Run containing text.
Document styles are obtained by accessing the Styles attribute, and a new style is added using the AddStyle method at line 41. This method specifies the style name, the style type (in this case, paragraph), and, by default, creates a paragraph style if the last parameter is set to true.
In the following lines (44 to 46), spacing for the hypothetical paragraph with this style is defined both before and after using the SetSpacing function. Alignment is set using SetAlignment, and indentation with SetFirstLineIndent.
Furthermore, custom line spacing is defined using SetLineSpacing, specifying the type and size. Finally, a new paragraph with a Run and text is added, and this style is applied to it using SetStyle. The file is saved at line 55.
Run the code
Execute the following command to create a Word page with a title, a header, and a paragraph with a customized style:
go run main.go
Sample output
