Simple Example
This guide will show you how to effectively use the unioffice library to create and format Word documents.
Before you begin
You should get your API key from your UniCloud account.
If this is your first time using UniOffice SDK, follow this guide to set up a local development environment.
Clone the project repository
In your terminal, clone the examples repository. It contains the Go code we will be using for this guide.
git clone https://github.com/unidoc/unioffice-examples
To get the example navigate to the path document/simple folder in the unioffice-examples directory.
cd unioffice-examples/document/simple/
How it works
Lines 4-13 import the UniOffice packages and other required dependencies.
The init function in lines 15-22 authenticates your request with your UNIDOC_LICENSE_API_KEY.
In the main function, the process of creating a new blank Word document begins with the use of document.New on line 28.
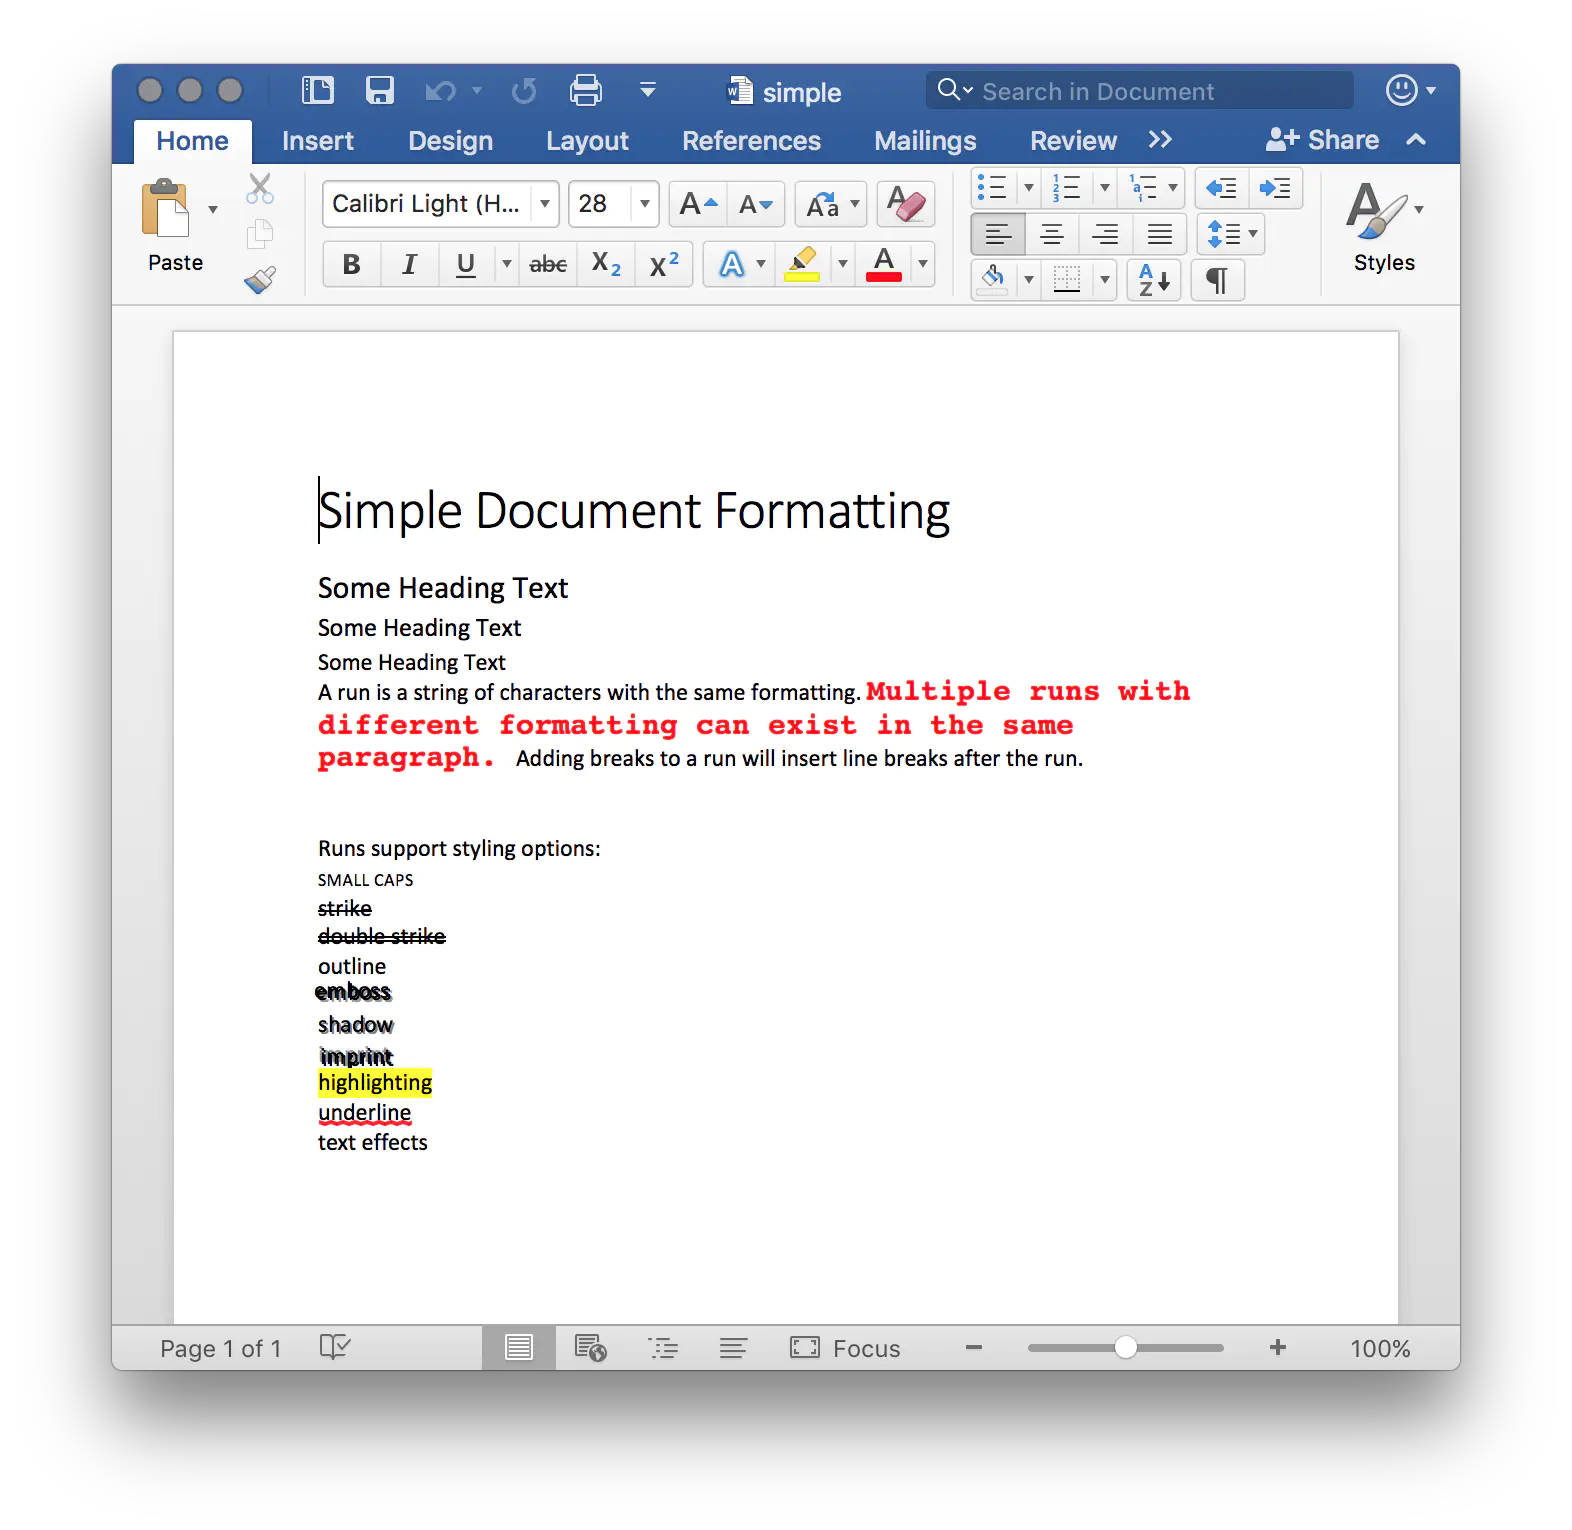
The code proceeds to add an initial paragraph containing the title “Simple Document Formatting” from lines 28 to 31. Following this, from lines 33 to 46, three additional paragraphs are added, each styled as a header, such as Heading1, Heading2, and Heading3. These paragraphs contain example text.
Another paragraph is introduced on line 48, which is subsequently formatted with a first-line indent using the SetFirstLineIndent method. Additionally, various text attributes are applied, including boldness, font family, size, and color. These formatting actions are executed from lines 48 to 62. On line 62, two line breaks are added using the AddBreak function.
Next, a custom function createParaRun is utilized in the document to add paragraphs with specific text, and it returns the created Run as the result. From lines 66 to 96, this function is employed multiple times, each time modifying different properties of the runs. These modifications include setting properties like Small Caps, Strike Through, Double Strike Through, Outline, Emboss, Shadow, Imprint, Highlight, Underline, and Text Effect.
Before concluding, a numbered list with four levels is created and added to the document from lines 98 to 106. This is accomplished using the SetNumberingLevel and SetNumberingDefinition functions.
Finally, the document is saved on line 107.
Run the code
Run the provided code to generate the simple example.
go run main.go
Sample output