Tables
This guide will illustrate the process of working with tables. You will gain proficiency in creating, inserting, editing, and customizing tables in your documents.
Before you begin
You should get your API key from your UniCloud account.
If this is your first time using UniOffice SDK, follow this guide to set up a local development environment.
Clone the project repository
In your terminal, clone the examples repository. It contains the Go code we will be using for this guide.
git clone https://github.com/unidoc/unioffice-examples
Navigate to the path document/tables folder in the unioffice-examples directory.
cd unioffice-examples/document/tables/
How it works
Lines 4-15 import the UniOffice packages and other required dependencies.
The init function in lines 17-24 authenticates your request with your UNIDOC_LICENSE_API_KEY.
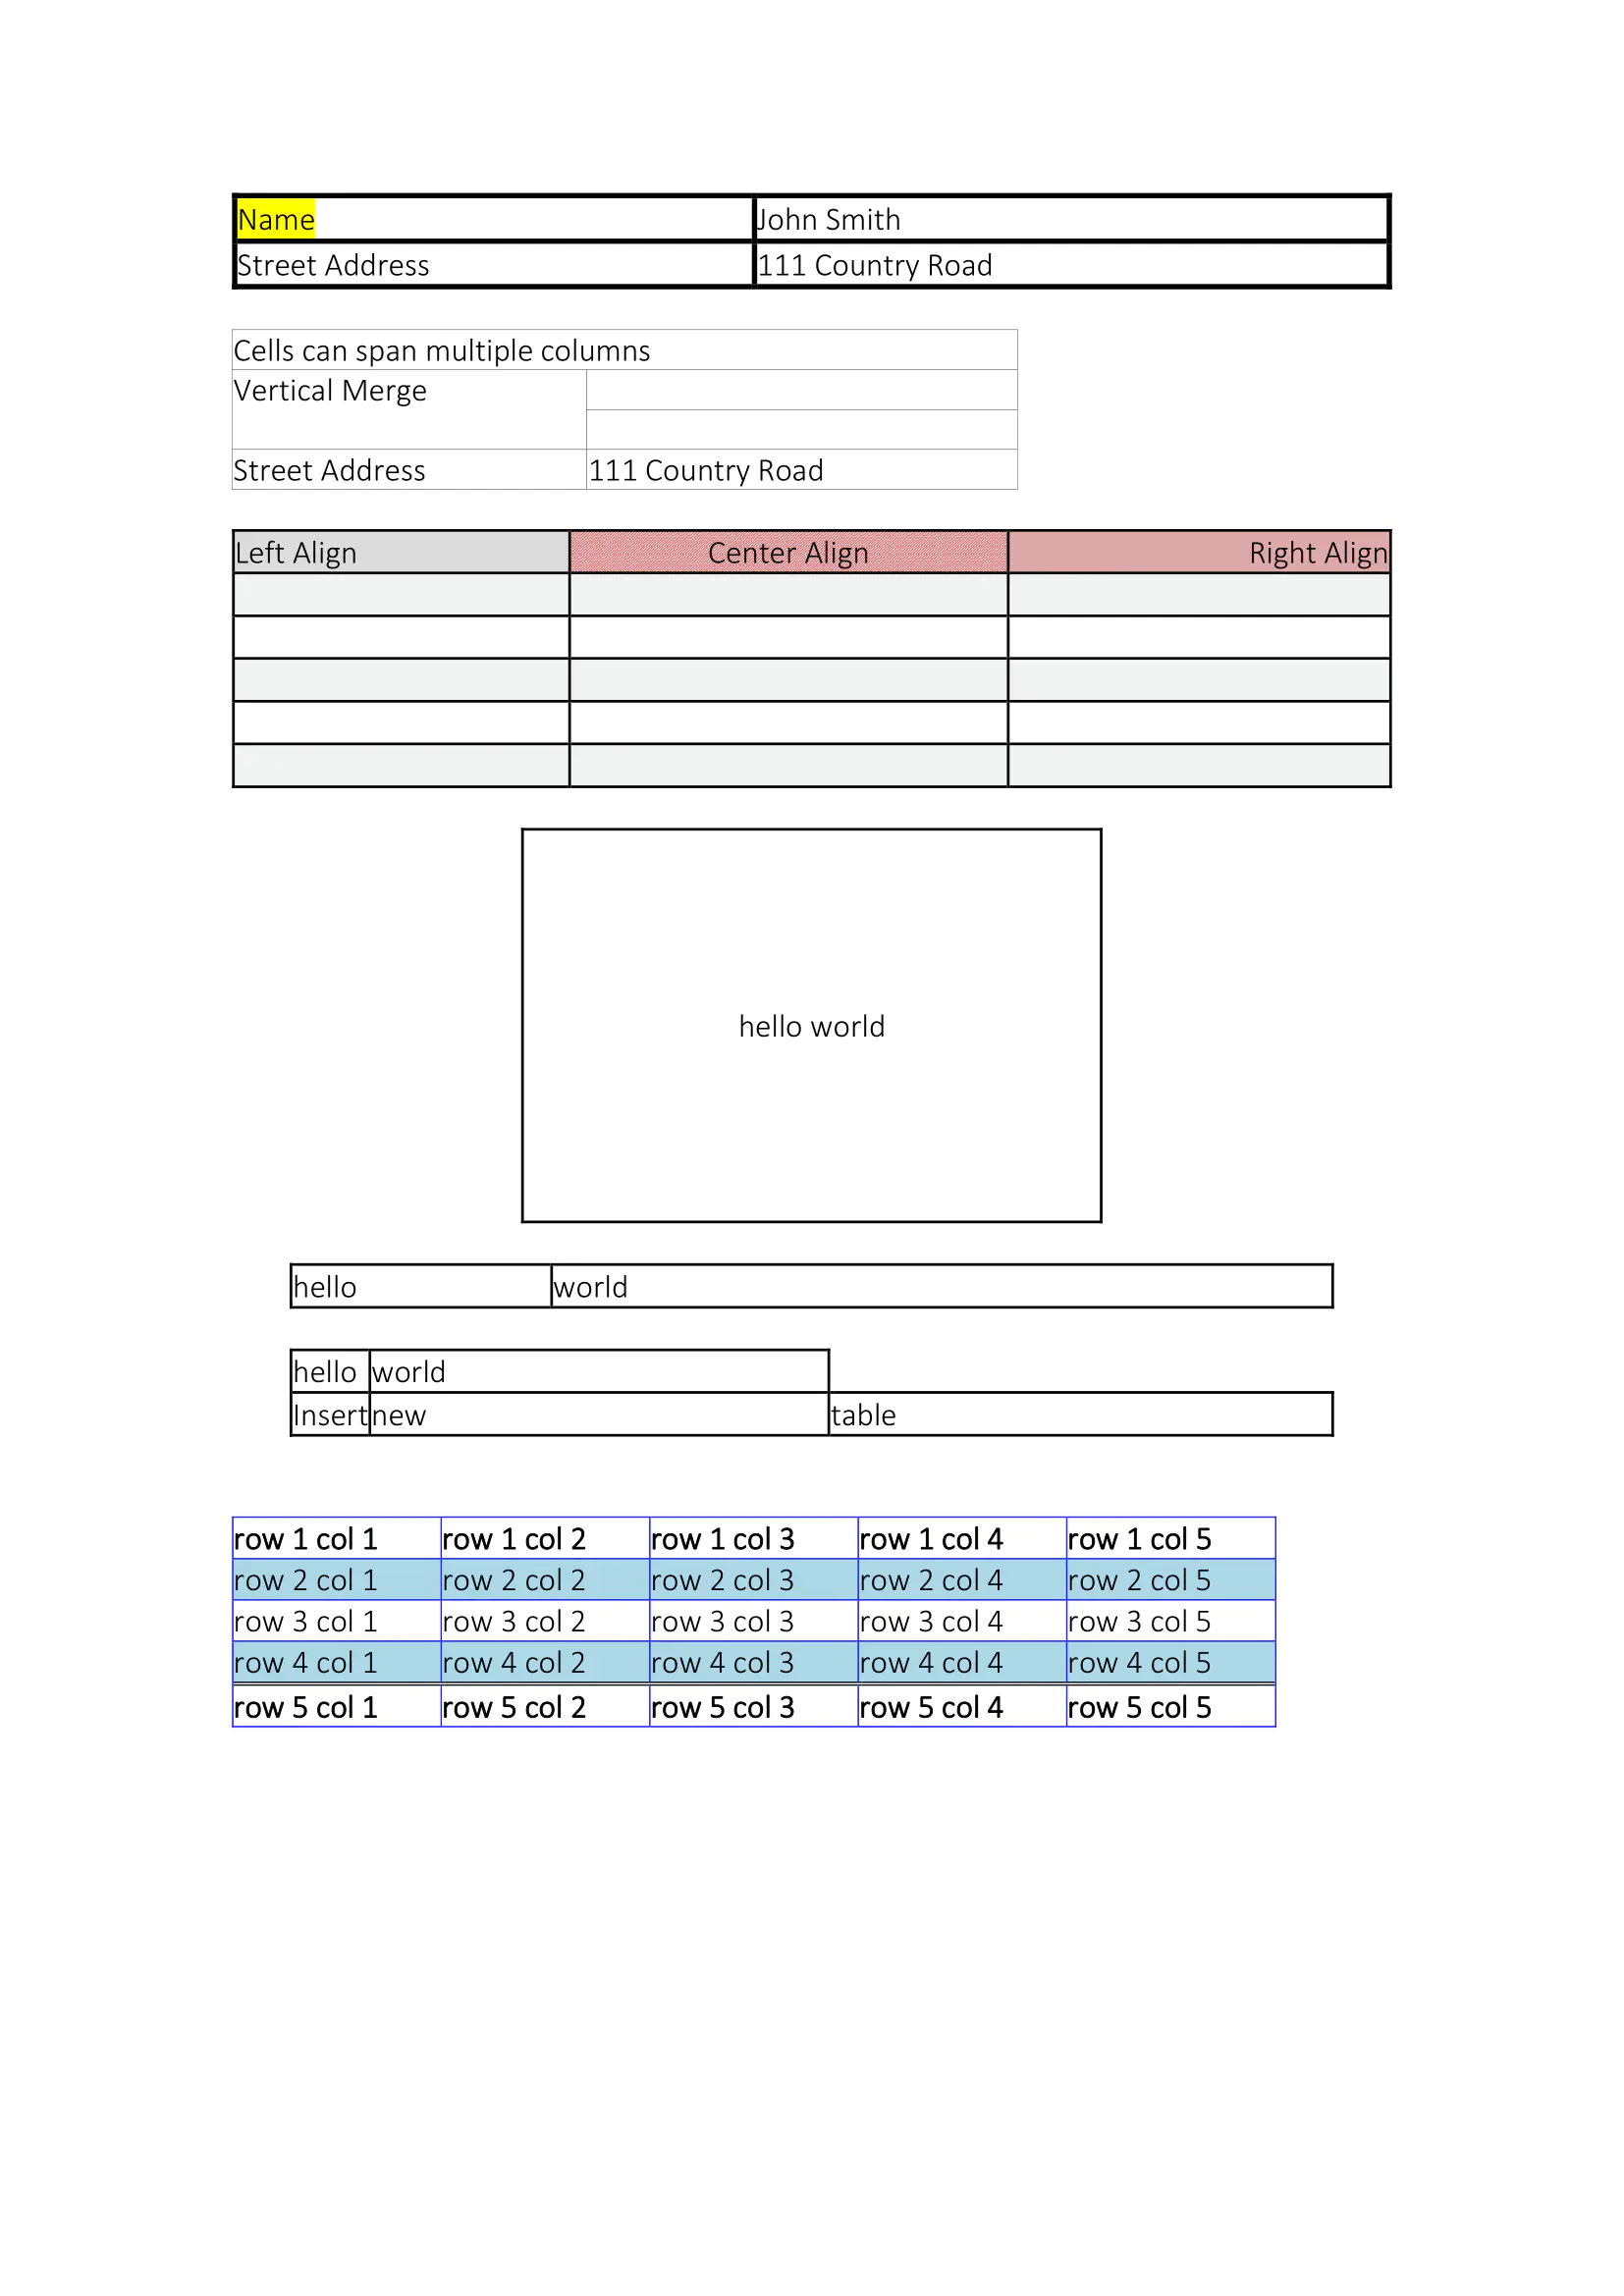
In the main function, spanning from line 26 to 272, the code creates seven different tables, each with distinct properties.
First Table
The first table, from lines 31 to 47, is created using the AddTable method. The width percentage is set using the SetWidthPercent function. Lines 36 and 37 define common border styles for all cells using the SetAll method.
Once the table is created, a row is added using the AddRow method. To this row, a cell is added with the AddCell method, and within this cell, a paragraph is created. Inside the paragraph, a run with the text “Name” is added. Following this, in the same row, another cell is added with another paragraph and run containing the text “John Smith.” Subsequently, another row is added, and two more cells are appended to it, each containing the texts “Street Address” and “111 Country Road,” respectively.
Second Table
To move on to the creation of the second table, a paragraph is added at the end of the first one using the AddParagraph method.
This table, spanning from line 52 to 83, is added to the document, and its width is set using the SetWidth method with a predefined measurement in inches. Once again, border styles are defined for the table, and a new row is added. This time, a cell is configured to span two columns using the SetColumnSpan method.
Following this, another row is created, containing two cells. The first cell utilizes the SetVerticalMerge function with the ST_MergeRestart attribute, while the second cell remains empty.
A similar row is added again, but this time the SetVerticalMerge function is used with the ST_MergeContinue attribute, causing the previous cell and this one to merge into a single cell, with only the text from the upper cell remaining.
Finally, one more row is added with two additional cells.
Third Table
In the third table that goes from line 88 to 126, the width percentage and border styles are configured. Subsequently, a row is added, and three cells are inserted. Each cell is given a shading style using the SetShading function, and a paragraph is added to each cell with the assigned alignment using the SetAlignment function.
On line 114, the color “LightGray” is defined, and a loop iterates five times. In each iteration, a row is added, and within each row, three cells are inserted, each with a paragraph and an empty run. Additionally, if the row is even, a shading style is applied using the SetShading method, as seen in line 121.
Fourth Table
The fourth table, spanning from line 130 to 147, is configured with a width percentage and centered alignment. The table properties also include border styles.
A row is added, and the row height is set to 2 inches with an exact height rule using the SetHeight method.
Within the row, a cell is added with vertical alignment set to center using SetVerticalAlignment. A paragraph is created in this cell, and the alignment for the paragraph is set to center using SetAlignment. A run is added to the paragraph with the text “hello world”.
Fifth and Sixth Tables
The fifth table, from line 151 to 194, is created with a width percentage and centered alignment. Border styles are applied to the table.
A row is added, and it contains two cells. The first cell’s width is set to 25% of the table width, and the second cell’s width is set to 75% using SetWidthPercent function. Paragraphs are added to both cells, each with the text “hello” in the first cell and “world” in the second cell.
Following this, a new table is started. It follows the same styling and consists of a row with two cells, each containing “hello” and “world” text, respectively.
Sixth Table - Insert
The sixth table, from line 241 to 266, demonstrates how to insert a new table into an existing document. It starts with the insertion of a new paragraph before an existing one and then inserts a table.
This inserted table follows the same styling as the previous tables, with a width percentage, centered alignment, and border styles. It consists of a row with three cells, each containing “Insert,” “new,” and “table” text, respectively.
Seventh Table - Styled
The seventh table, spanning from line 197 to 238, is constructed using a custom table style named “MyTableStyle”. This style encompasses various formatting options. Firstly, it sets the row band size with SetRowBandSize, then the column band size with SetColumnBandSize, and finally, it specifies the table’s indent with SetTableIndent.
In lines 206 and 207, horizontal banding is established for the table. This involves alternating the background shading of rows to create a striped appearance.
On lines 210 and 211, it’s indicated that the first row of the table should be formatted in bold. Similarly, lines 214 and 215 specify that the last row of the table should be in bold, along with assigning a double top border.
At line 219, border styles for the table are applied, and subsequently, the table is added to the document. Following this, the layout, width percentage, and the previously defined style using SetStyle (line 225) are set.
Next, using TableLook, a reference to the table’s appearance properties is obtained. All the previously defined special properties in the created style are then applied, including SetFirtsColumn, SetFirtsRow, and SetHorizontalBanding.
Lastly, using two nested loops, a table with 5 rows and 5 cells in each row is generated. Each cell contains text indicating its corresponding row and column, all while adhering to the previously defined style.
Run the code
To generate a Word document that contains all these mentioned tables, execute the following command:
go run main.go
Sample output