Conditional Formatting
This guide will demonstrate the process of creating spreadsheet file with conditional cell formatting.
Before you begin
You should get your API key from your UniCloud account.
If this is your first time using UniOffice SDK, follow this guide to set up a local development environment.
Clone the project repository
In your terminal, clone the examples repository. It contains the Go code we will be using for this guide.
git clone https://github.com/unidoc/unioffice-examples
To get the example navigate to the path spreadsheet/conditional-formatting folder in the unioffice-examples directory.
cd unioffice-examples/spreadsheet/conditional-formatting/
How it works
The example above, starts by importing the necessary packages from UniOffice and standard Go library.
Then it initializes the code by setting the metered API license code in order to use UniOffice packages.
In the main function in lines 23-25, a new workbook is created with a new sheet.
Then the required tables are created using the for loop in lines 27-36.
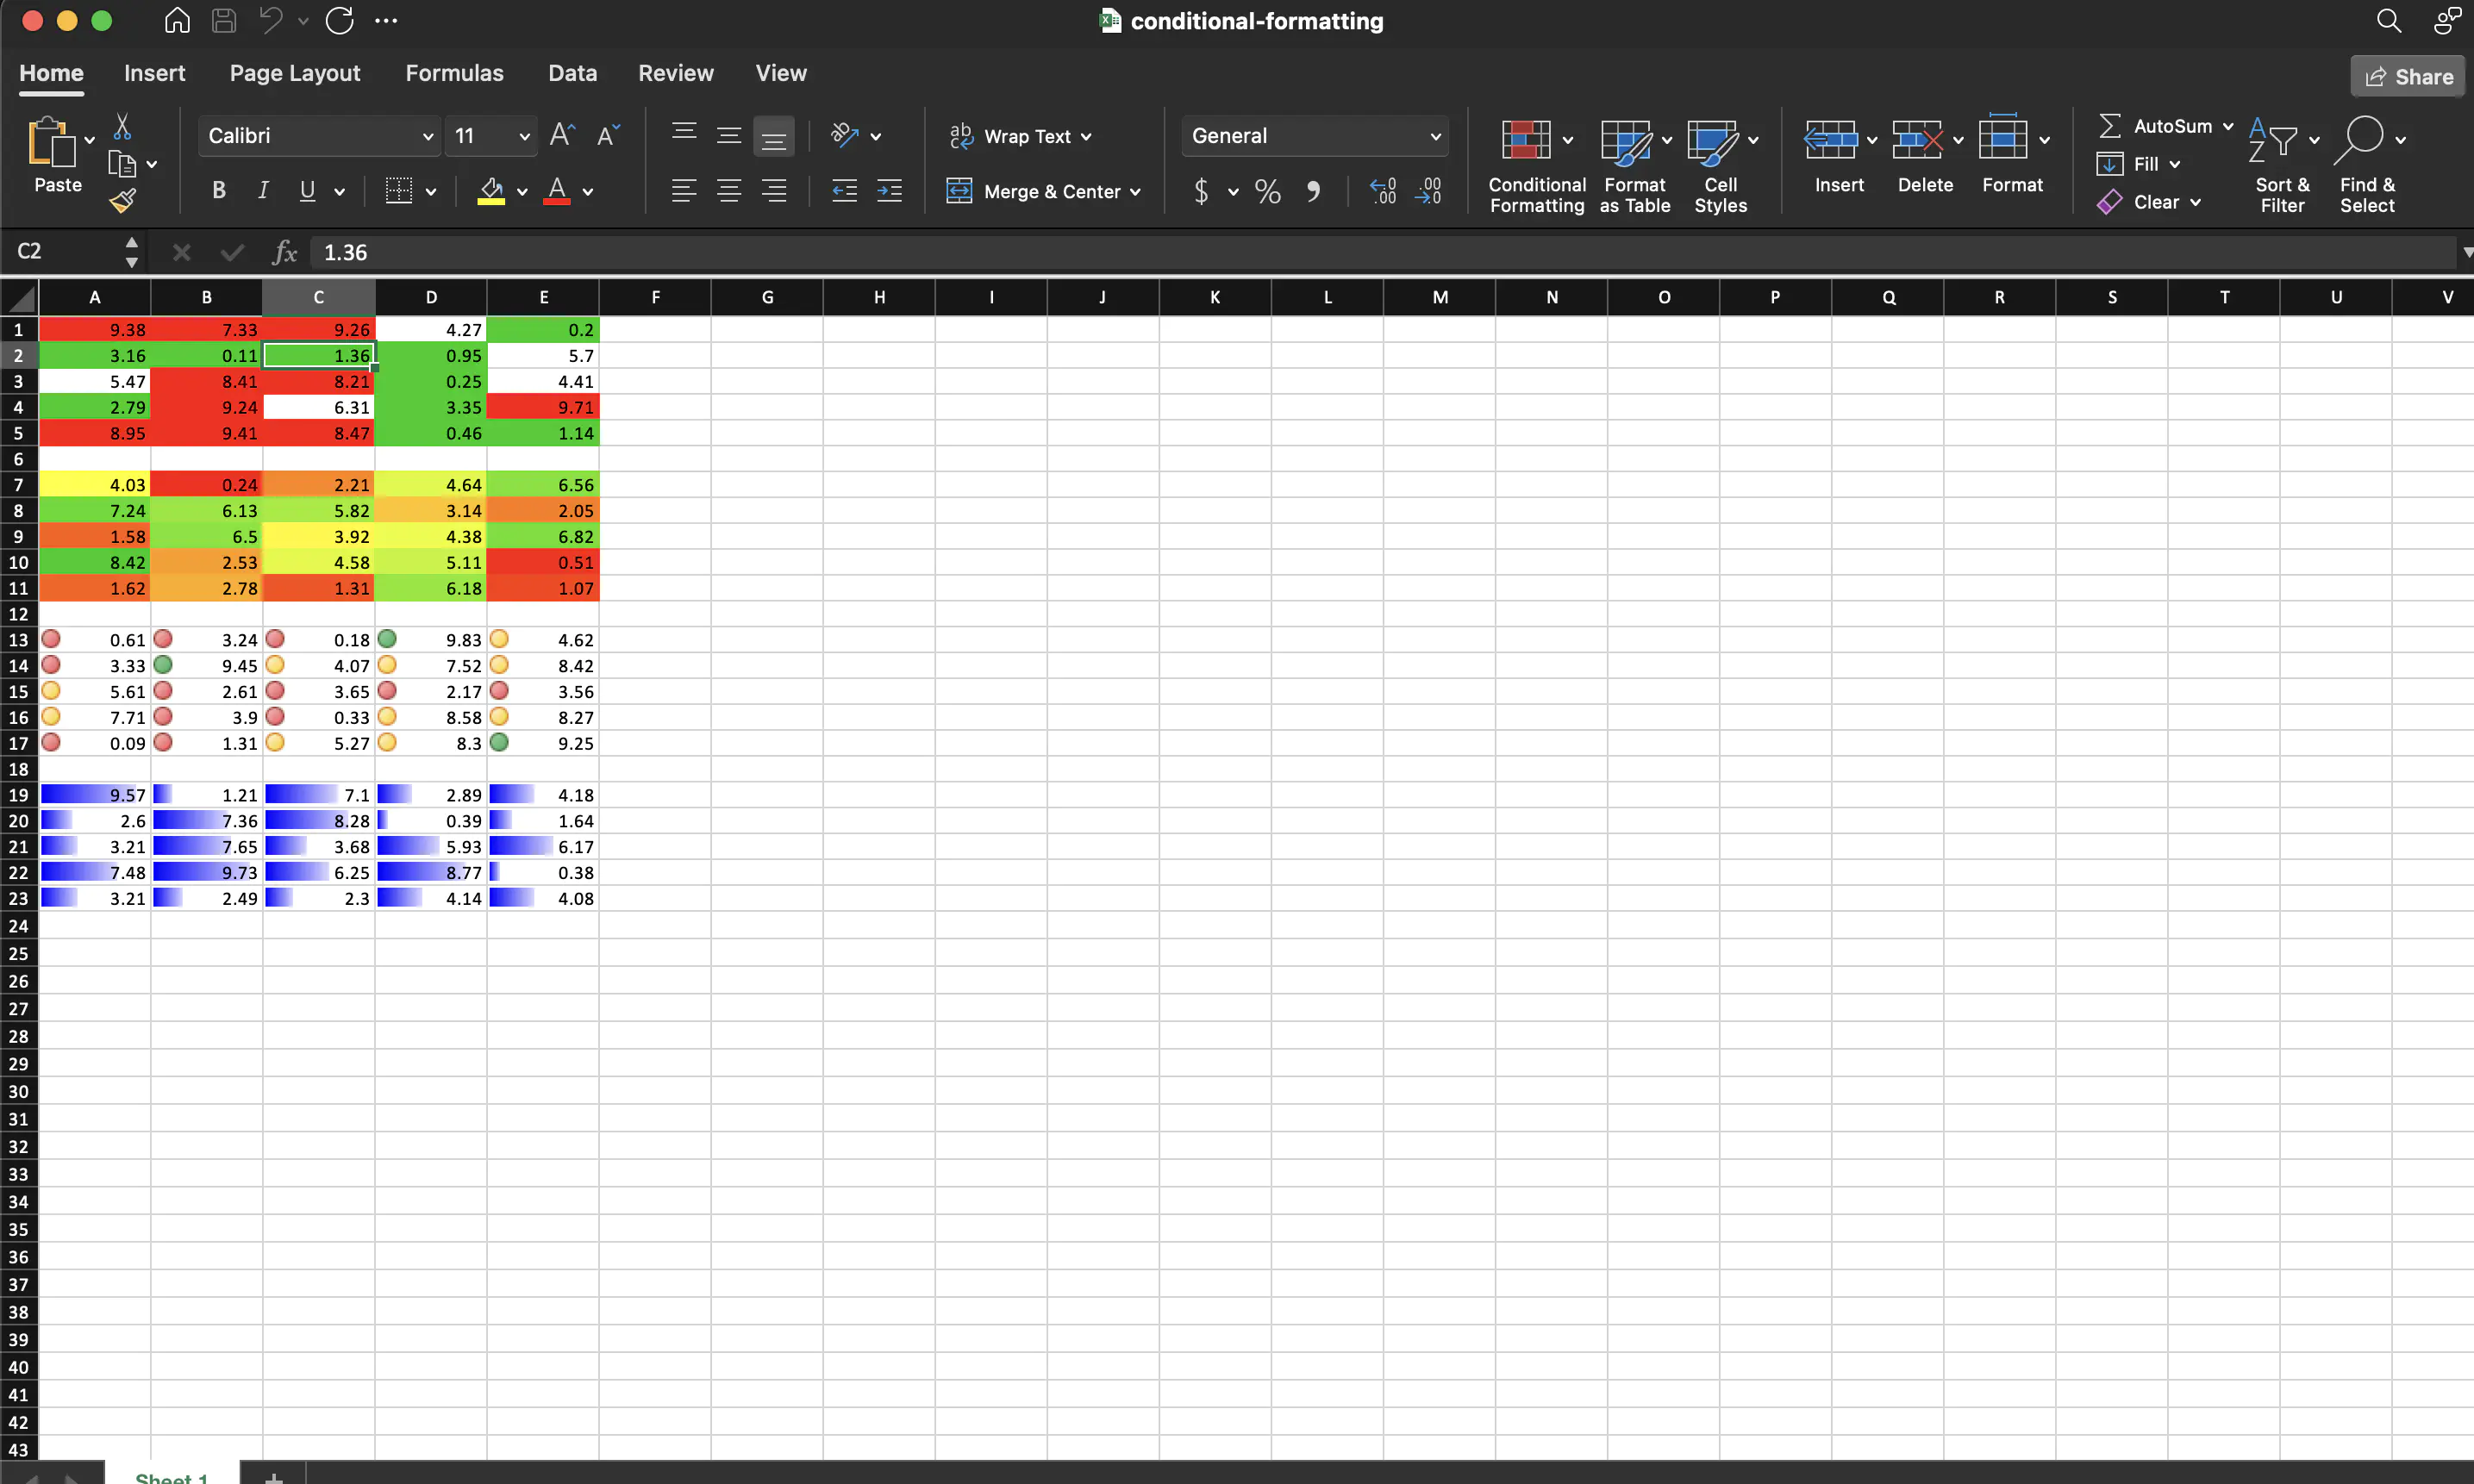
As seen in the code, each table has 5 rows and each cell of the table rows is populated with random number using cell.SetNumber(float64(rand.Intn(1000)) / 100.0). Every 6th row is used as a table separator by leaving it empty, i.e., without any cell. The conditional code in line 28-30 creates this empty row.
The code block in line 37-62, specifies the conditional formatting of the range A1:E5. First it starts by creating spreadsheet.ConditionalFormatting object. Then it creates a new rule using cfmt.AddRule() in line 39. Then the rule is set to be applied for a value greater than 4. This is done using the following snippet.
// Set the type of the rule
r.SetType(sml.ST_CfTypeCellIs)
// Set the conditional operator. In this case Less than
r.SetOperator(sml.ST_ConditionalFormattingOperatorLessThan)
// the value to be compared to.
r.SetConditionValue("4")
Then the type of formatting that is to be applied to cells that fulfill the above rule is defined in lines 47-49. This is done as follows:
green := ss.StyleSheet.AddDifferentialStyle()
green.Fill().SetPatternFill().SetBgColor(color.SuccessGreen)
r.SetStyle(green)
A background color of green is applied to the cells according to the rule defined earlier.
In lines 51-61 defines a rule that sets a background color of red to cells with value greater than 7.
The rest of the code, i.e. lines 64-92, sets different rules to cell ranges A13:E17, A13:E17 and A19:E23 In same way as shown above, except the change in background color or formatting rule.
Then in lines 94-98, the spreadsheet is validated and saved to file using:
if err := ss.Validate(); err != nil {
	log.Fatalf("error validating sheet: %s", err)
}

ss.SaveToFile("conditional-formatting.xlsx")
Run the code
To create the spreadsheet run the following command.
go run main.go
Sample Output
