Insert Rows
This guide will demonstrate the process of inserting rows from the spreadsheet of the workbook sheet using UniOffice.
Before you begin
You should get your API key from your UniCloud account.
If this is your first time using UniOffice SDK, follow this guide to set up a local development environment.
Clone the project repository
In your terminal, clone the examples repository. It contains the Go code we will be using for this guide.
git clone https://github.com/unidoc/unioffice-examples
To get the example navigate to the path spreadsheet/insert-rows folder in the unioffice-examples directory.
cd unioffice-examples/spreadsheet/insert-rows/
How it works
The import section in lines 4-11 imports the necessary libraries from UniOffice and the standard Go library.
The init function sets the license key using license.SetMeteredKey(os.Getenv(`UNIDOC_LICENSE_API_KEY`)).
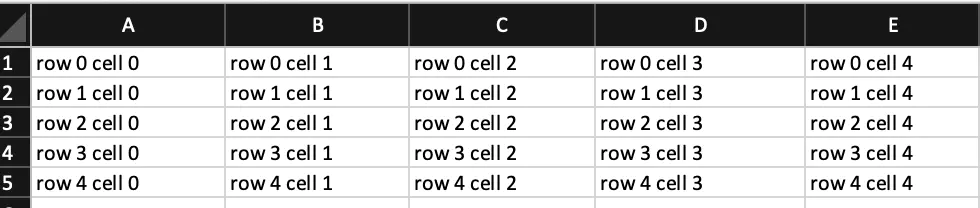
Inside the main function, a new Workbook is created in line 23. Then a new spreadsheet.Sheet is added to the workbook using ss.AddSheet(). Using the nested for loop in lines 27-34 a table of dimension 5 by 5 is created which looks like as follows.
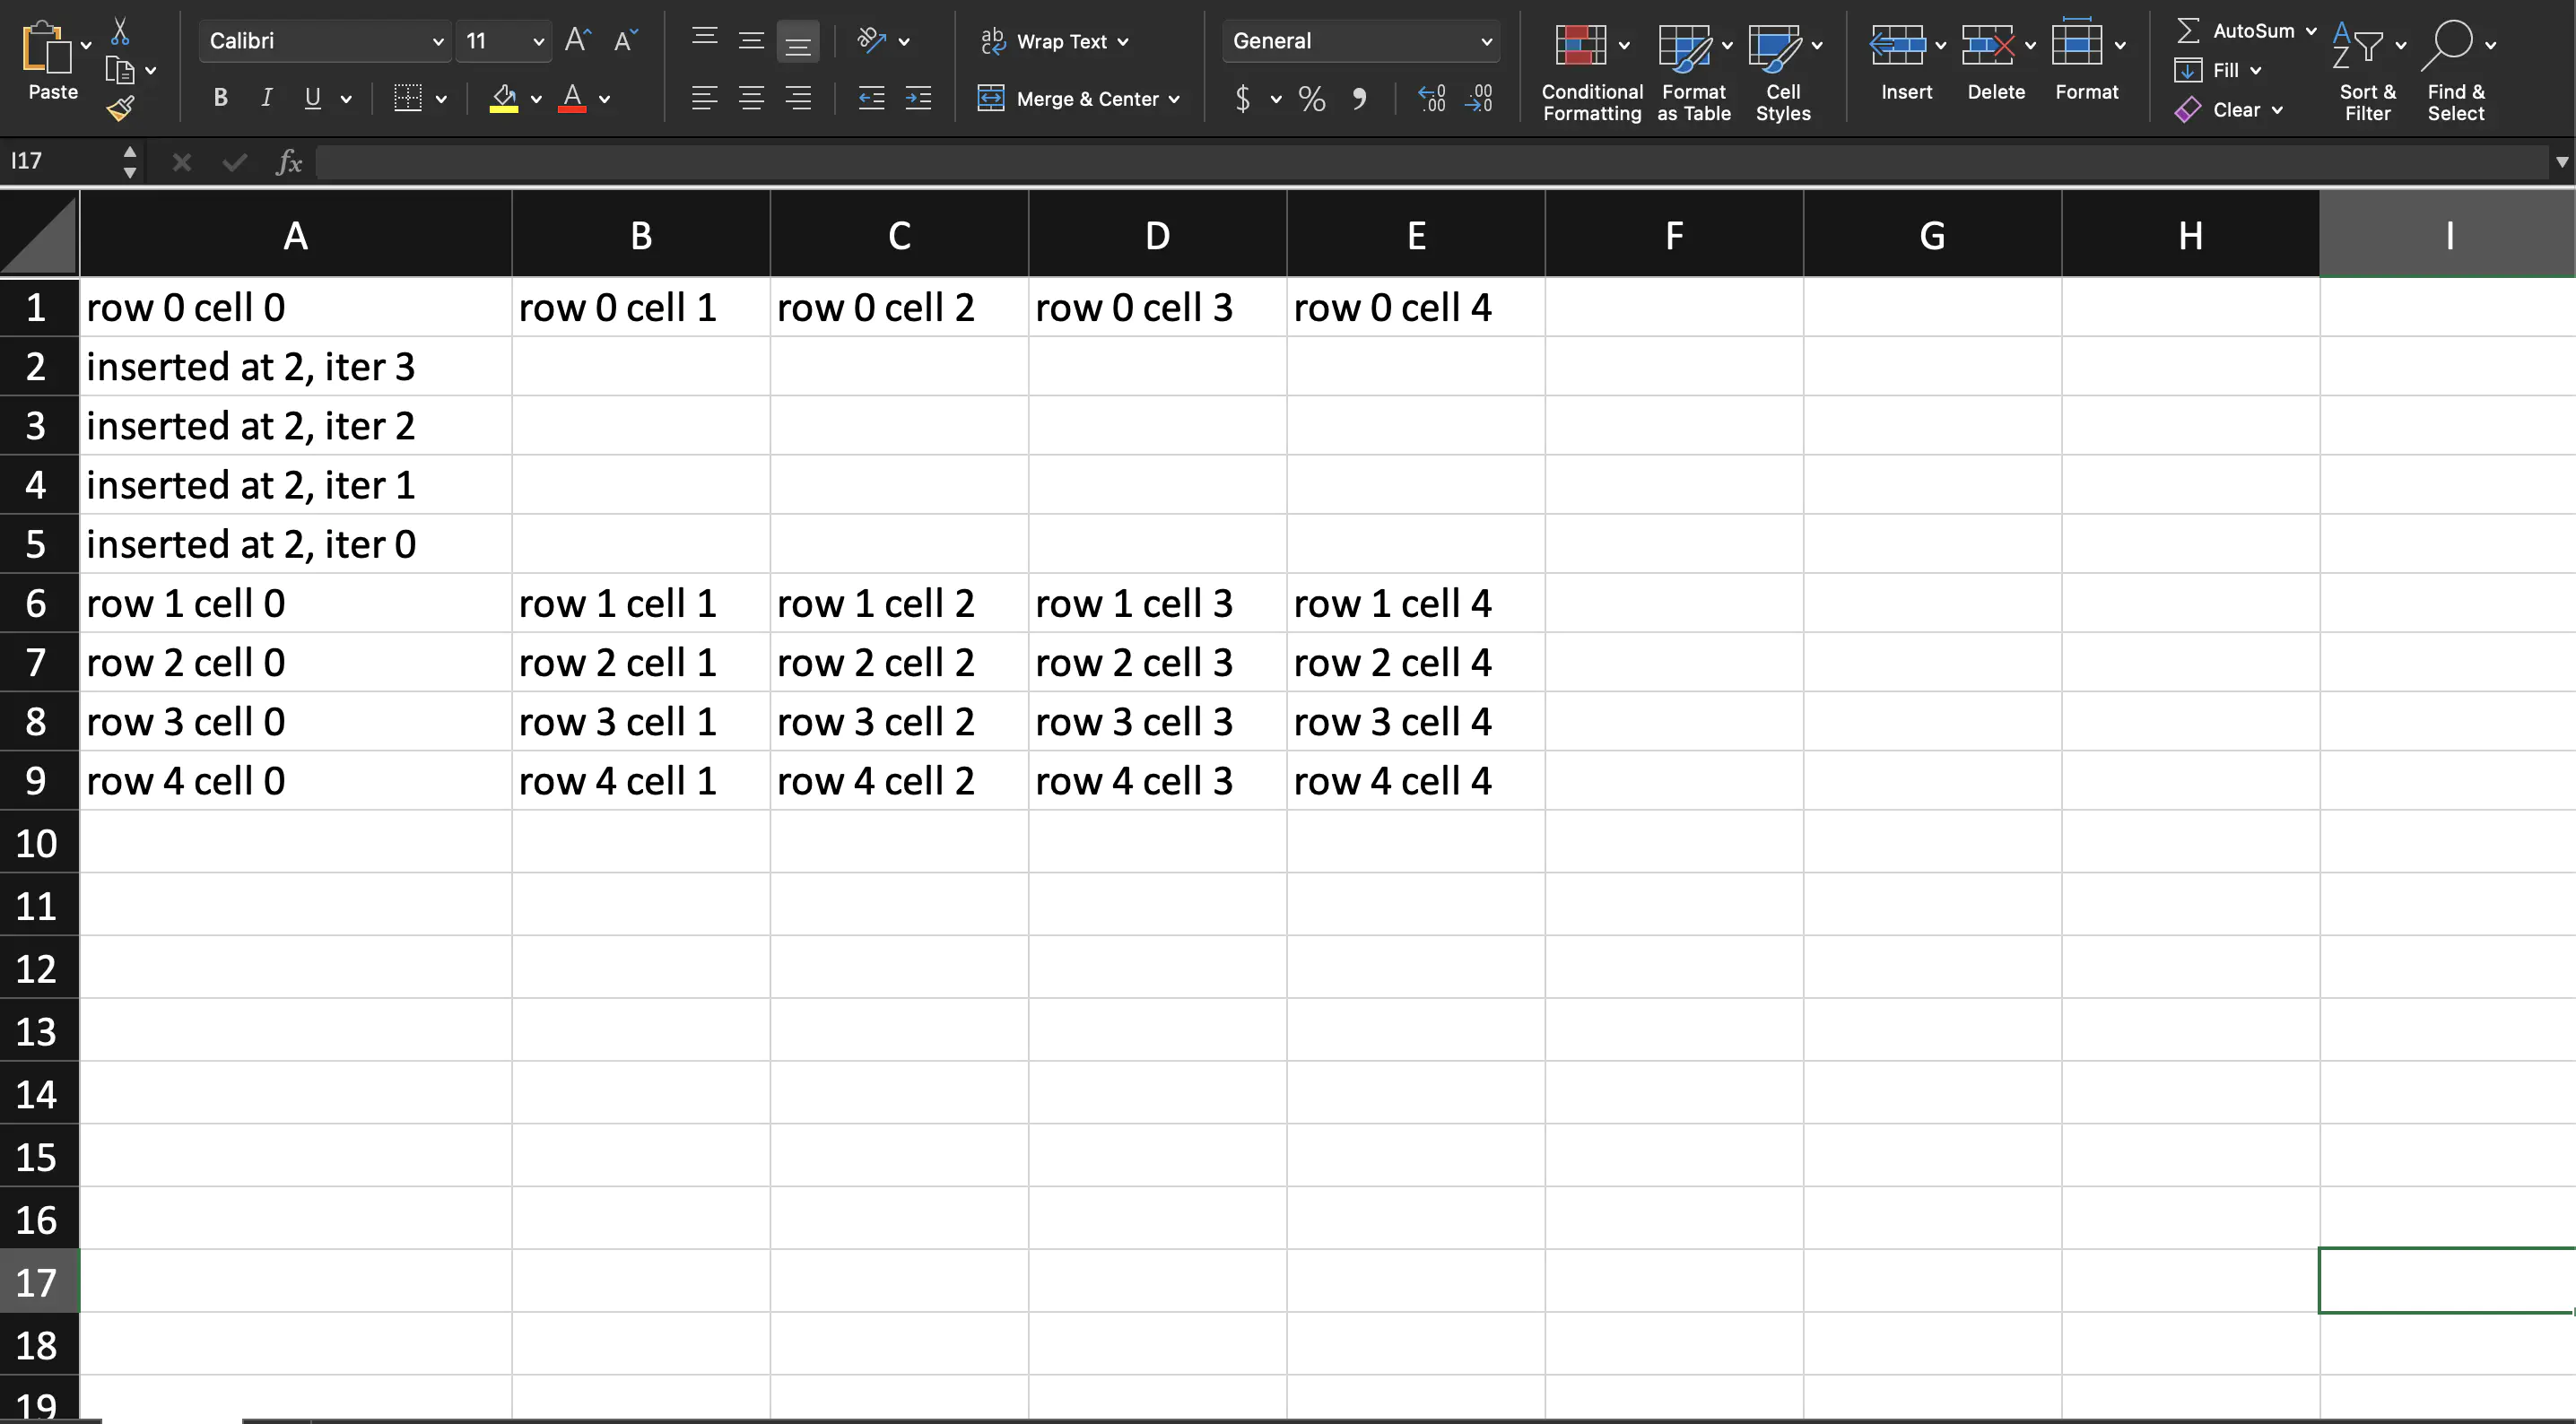
Then by calling the InsertRow method of the preadsheet.Sheet object, a new row is created at specific position (in this case 2). This operation will renumber every previous row by pushing them downwards. Five rows are created in this manner using the for loop in lines 39-41 as follows.
for i := 0; i < 4; i++ {
	sheet.InsertRow(2).AddCell().SetString(fmt.Sprintf("inserted at 2, iter %d", i))
}
This for loop will create the section of the table shown below.

Notice the reversed iteration numbers. This is the effect of sheet.InsertRow(2). It pushes the previous row and adds a new one position 2.
Finally, the workbook is validated and saved to file in lines 41-45.
Run the code
Use the following command to run the code.
go run main.go
Sample Output