Headers
In this guide you will see how to create tables with a header row configured. This header row can be repeated automatically on every new page if the table is multi page spanning. This guide also shows how to add an image to a given table cell.
Before you begin
You should get your API key from your UniCloud account.
If this is your first time using UniPDF SDK, follow this guide to set up a local development environment.
Project setup
Clone the project repository
In your terminal, clone the examples repository. It contains the Go code we will be using for this guide.
git clone https://github.com/unidoc/unipdf-examples.git
Navigate to the tables folder in the unipdf-examples directory.
cd unipdf-examples/tables
How it works
The following example code shows how to create a table with header row and how to add image to table cells.
The import section in lines 9-17 imports unipdf packages creator, model, and license and other necessary libraries.
The init() function in lines 18-25 authenticates your request by loading your metered License API key before running the main function.
The main function defined in lines 28-53 creates the pdf document with the table and writes it to file.
Lines 29-30 in this function instantiate a new creator.Creator object by calling creator.New() and sets the margins for the page. Lines 34-42 create the necessary fonts for the document. The tableHeaders function is called in line 45. Finally the document is written to file in lines 50-52.
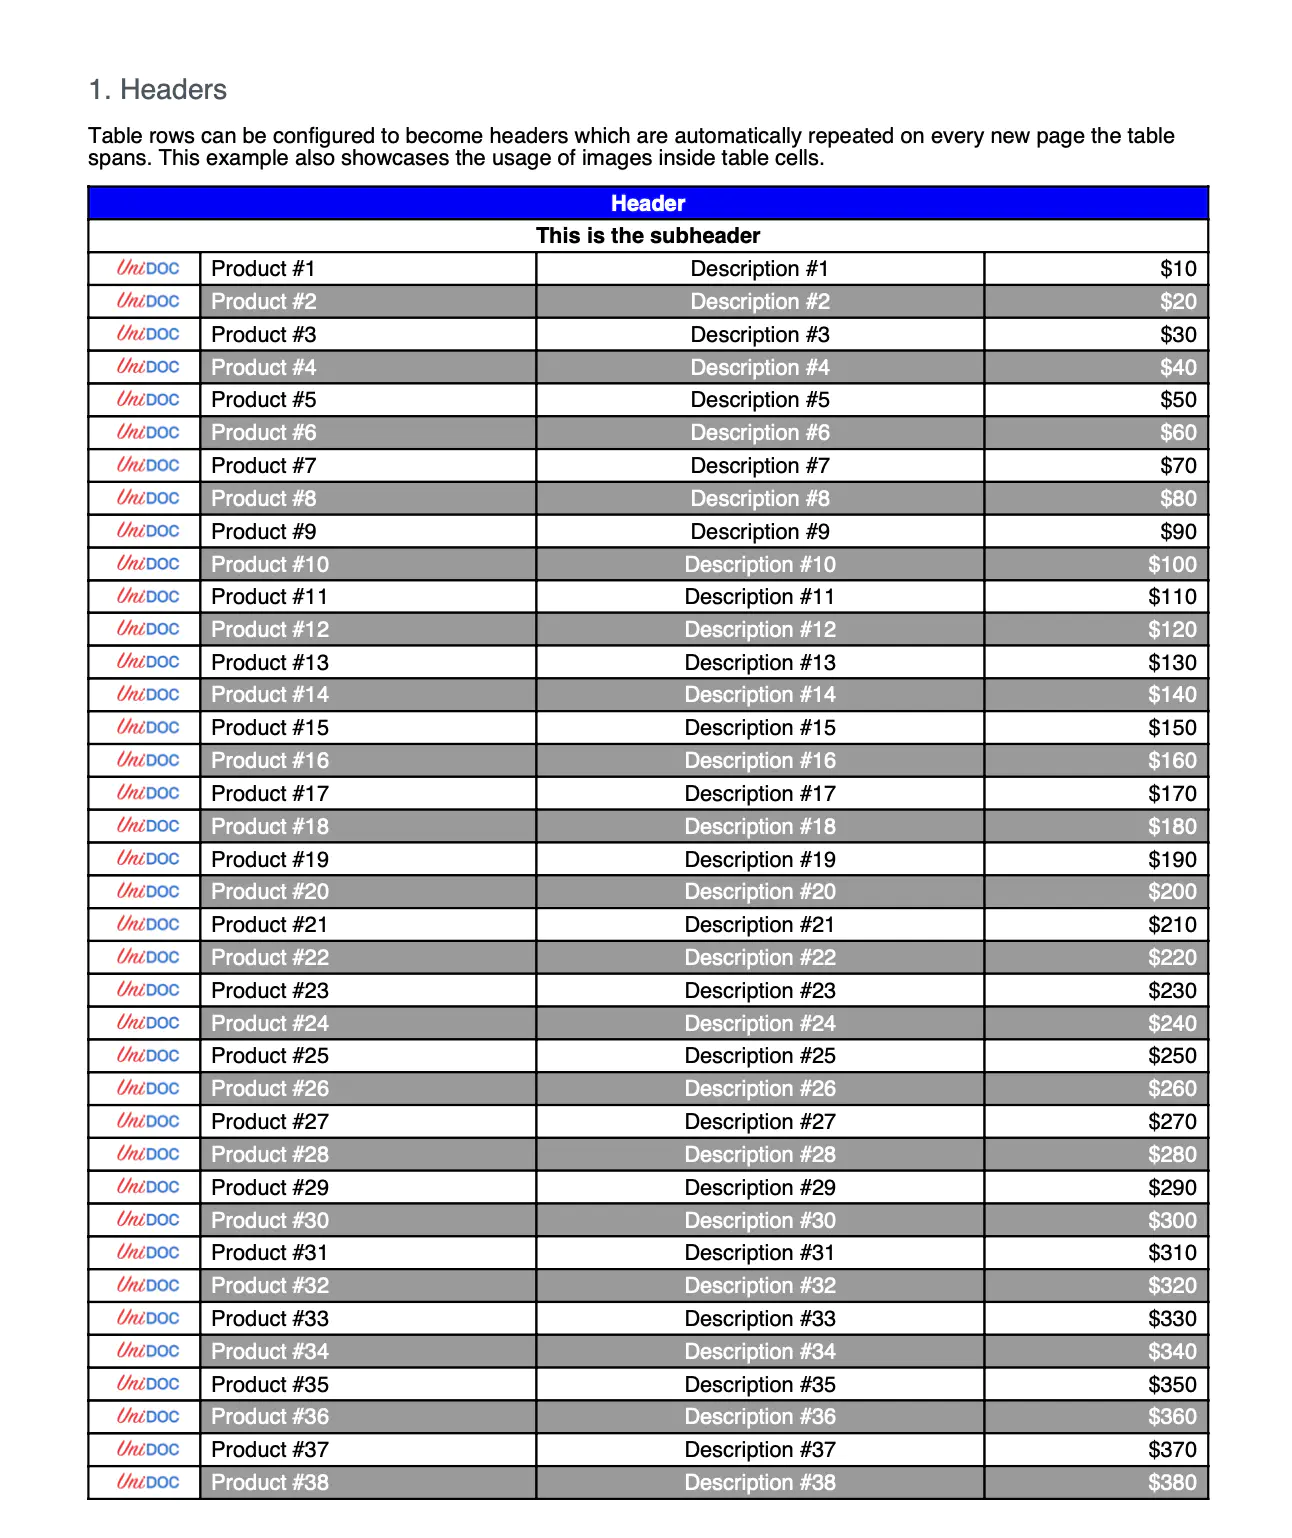
In lines 55-130 the tableHeaders function is defined. Here is where all the components of the example document are created. In lines 57-61 the header component of the page is defined. This is created by using c.NewChapter("Headers"). A new description paragraph is also created in lines 64-66 and is added to chapter using ch.Add(desc).
A table with 4 columns is created using c.NewTable(4) in line 79.
In lines 83-94 an anonymous function for drawing a table cell is defined. In line 96 and 97 two table cells that span 4 columns are drawn. In line 98 the two rows are set to be Header rows by calling table.SetHeaderRows(1, 2). This means rows 1-2 are header rows.
In the loop in lines 101-120 the content of the tables is created one row at a time. This means 4 cells are drawn per iteration.
The first cell is drawn in lines 112-115. This cell contains an image which is set using cell.SetContent(img) at line 115.
The rest 3 cells of the row are drawn in lines 117-119.
In line 122 the table is added to the chapter object using ch.Add(table). Finally the chapter is drawn in lines 125-127 using c.Draw(ch).
Run the code
To create the example document run the code using the following command.
go run pdf_tables_header_images.go
Sample output
This is the first page of the output pdf document.