Row Wrap
This guid will show you how to create tables that have page wrapping rows. This means when the remaining space on the page is not enough to display the full content of the row, the remaining part of the rows gets moved to the next page.
Before you begin
You should get your API key from your UniCloud account.
If this is your first time using UniPDF SDK, follow this guide to set up a local development environment.
Project setup
Clone the project repository
In your terminal, clone the examples repository. It contains the Go code we will be using for this guide.
git clone https://github.com/unidoc/unipdf-examples.git
Navigate to the tables folder in the unipdf-examples directory.
cd unipdf-examples/tables
How it works
The following example code shows how page wrapping tables are created.
The import section in lines 9-17 imports unipdf packages creator, model, and license and other necessary libraries.
The init() function in lines 18-25 authenticates your request by loading your metered License API key before running main function.
The main function in lines 27-50 instantiates a new creator object and calls both rowWrapDisabled and rowWrapEnabled functions to create tables with row wrapping disabled and row wrapping enabled respectively. In line 47 it writes the document to unipdf-tables-row-wrap.pdf file.
Lines 52-94 define rowWrapDisabled function that creates a table with row wrapping disabled.
In lines 53-70 of this function a heading paragraph and a description paragraph are created.
Then in lines 72-93 the fillTable function is used to create the desired table by giving the necessary parameters. Here the third parameter specifies enable wrap property and is set to false to disable page wrapping when creating the table.
The rowWrapEnabled function defined in lines 96-142 creates a table with page wrapping enabled.
Here the fillTable function is used to create the table with row wrapping set to true.
In lines 150-179 the fillTable function is defined where a table is created using lineCount, enableRowWrap and addExtraRows parameters. In lines 153 a table with 4 columns is created using c.NewTable(4).
The code table.EnableRowWrap(enableRowWrap) is the most important one on this example. This is where the page wrapping is enabled or disabled depending on the value of enableRowWrap.
Run the code
To create the example document run the code using the following command.
go run pdf_tables_row_wrap.go
Sample output
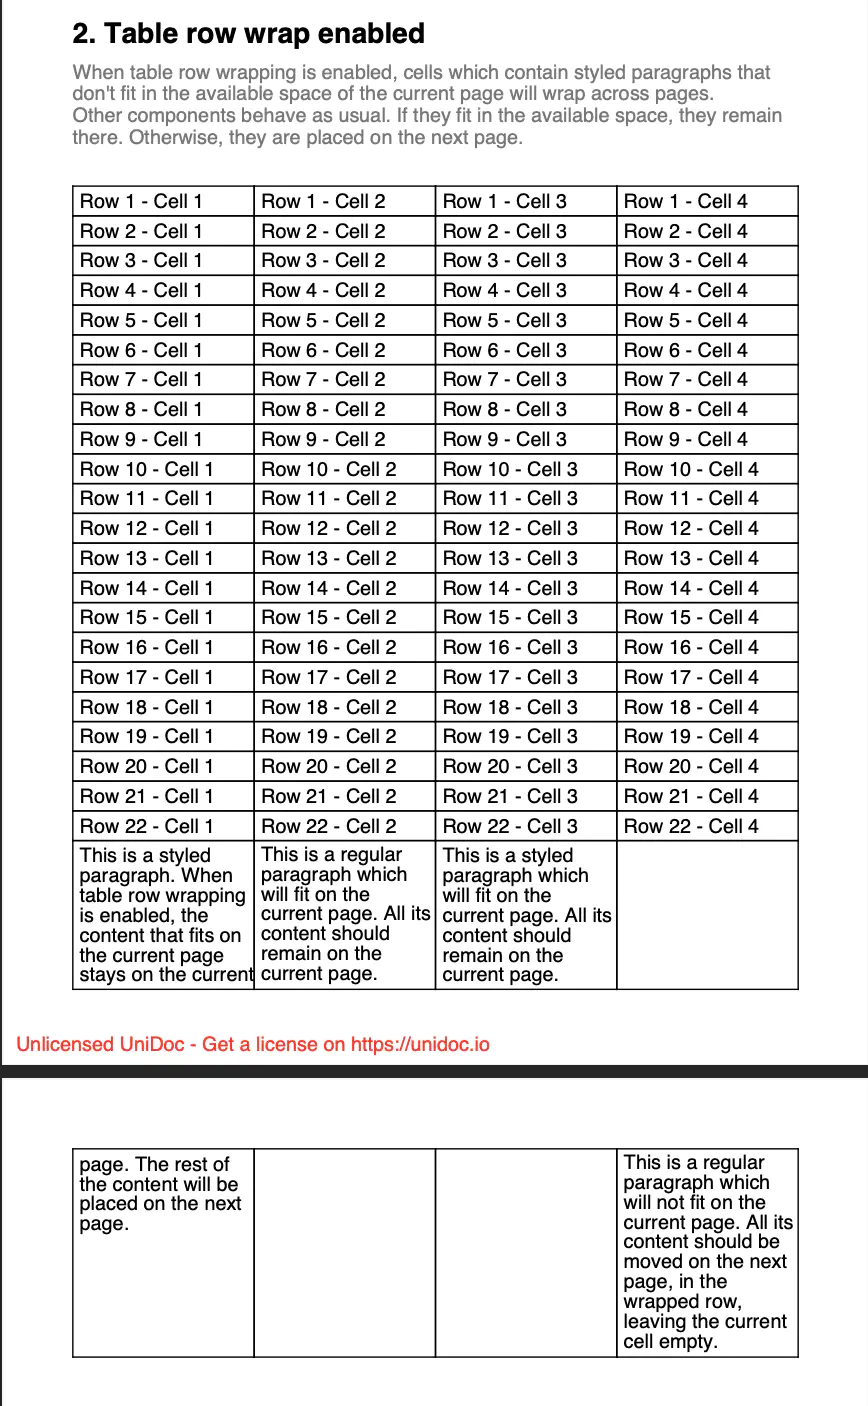
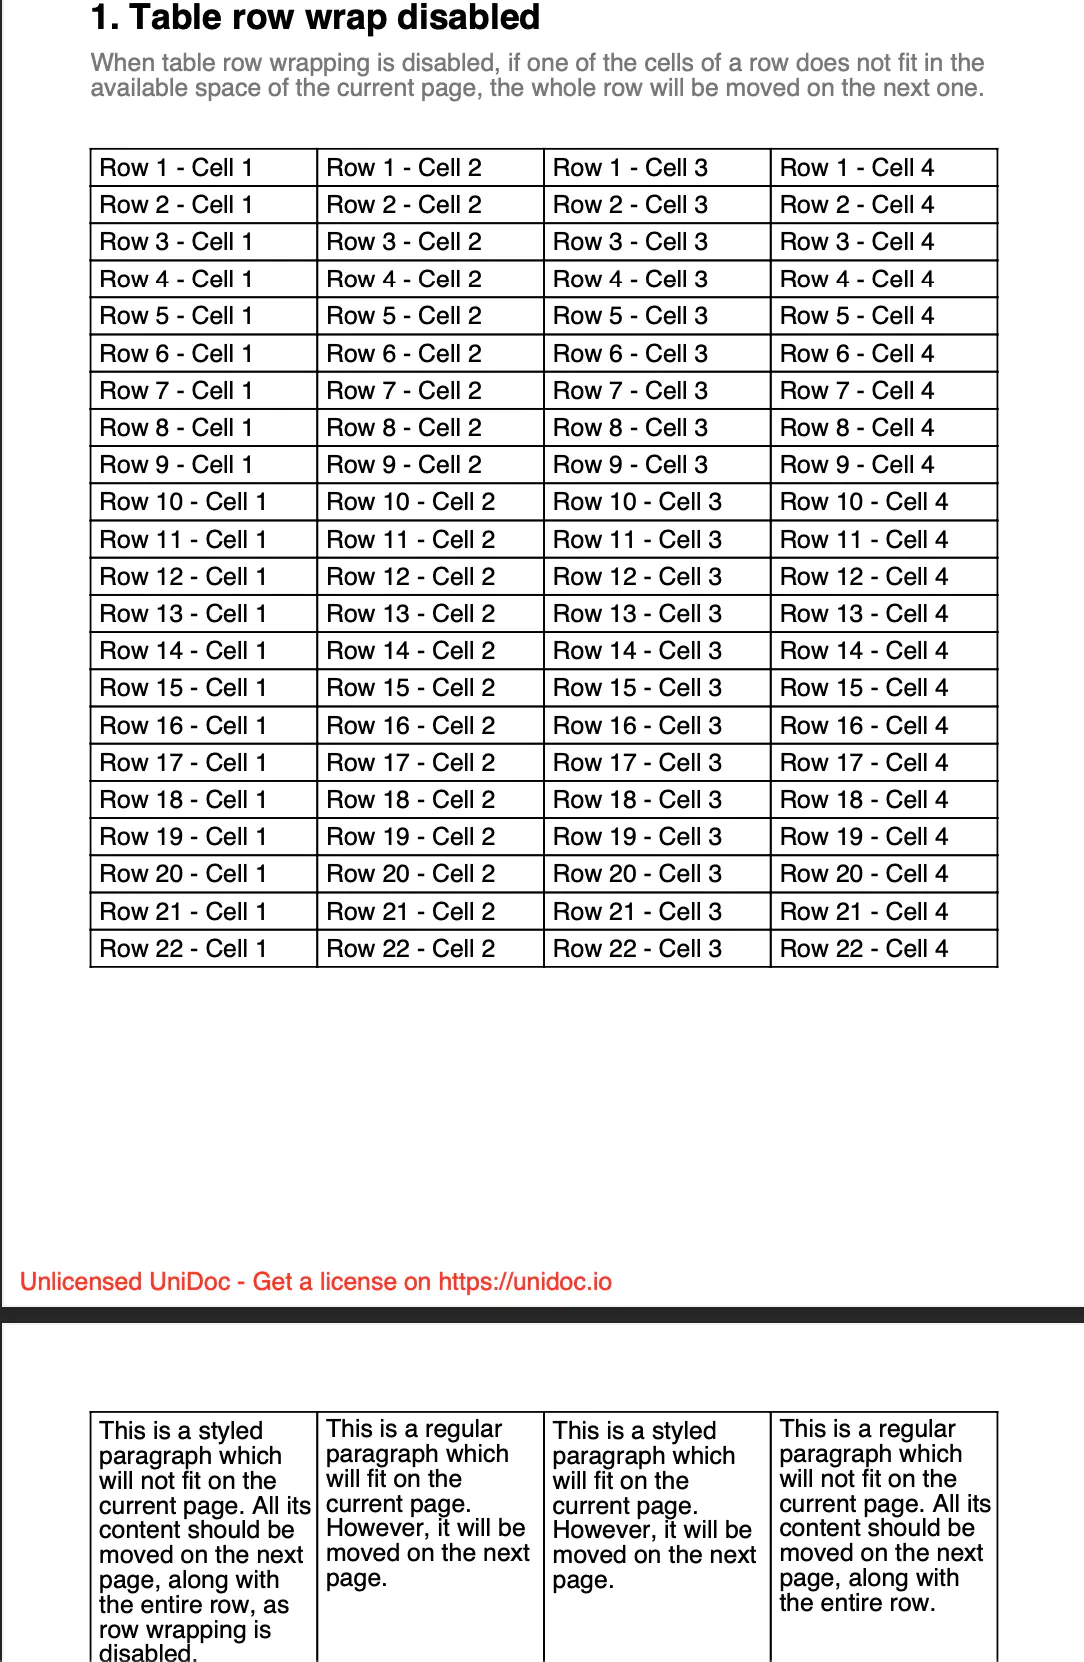
The following output shows both with row wrapping disabled and row wrapping enabled.
- Row wrapping disabled
- Row wrapping enabled