Simple
Before you begin
You should get your API key from your UniCloud account.
If this is your first time using UniPDF SDK, follow this guide to set up a local development environment.
Project setup
Clone the project repository
In your terminal, clone the examples repository. It contains the Go code we will be using for this guide.
git clone https://github.com/unidoc/unipdf-examples.git
Navigate to the tables folder in the unipdf-examples directory.
cd unipdf-examples/tables
How it works
The import section in lines 9-17 imports the necessary packages and libraries.
The init function loads you metered license key and authenticates your request.
In lines 28-53 the main function is defined where Creator object is instantiated and the basicUsage function is called. Writing the document to file is also done in this function.
Here is a list of basic usages from the example code.
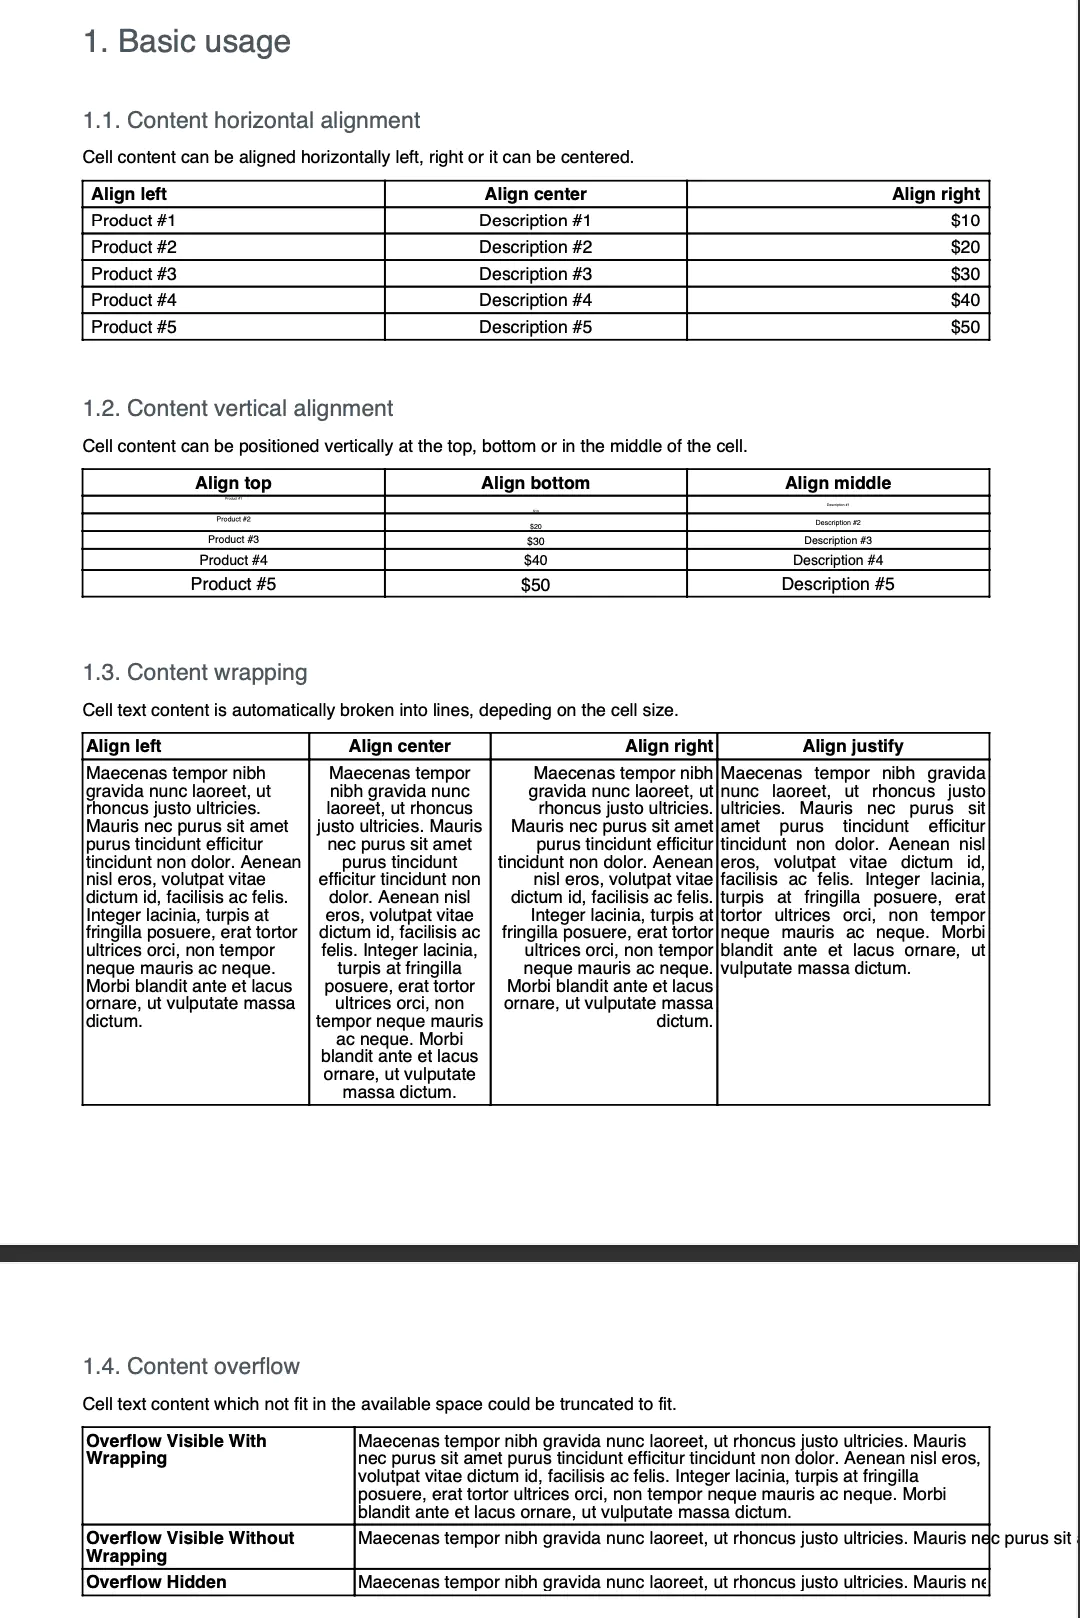
1. Content horizontal alignment
Horizontal alignment means aligning a cell content horizontally, i.e left, right or center.
This is done in the function contentAlignH which is defined in lines 77-121. In this function a table with 3 columns is crated using c.NewTable(3). The anonymous function in 96-104 which is assigned to drawCell is used to draw a single table cell using the provided parameters.
In lines 107-109 the draCell function is used to draw three table cells which are used as the header row of the table. The values creator.CellHorizontalAlignmentLeft, creator.CellHorizontalAlignmentCenter and creator.CellHorizontalAlignmentRight which are passed to drawCell function are used to set the horizontal alignment of the table cell content being drawn. The loop in lines 112-118 draws the rest of the table one row at a time.
2. Content vertical alignment
Vertical alignment specifies wether a content is drawn top, middle or bottom inside a given table cell. This alignment is shown in the example code in the function contentAlignV. Here the vertical alignment is defined using creator.CellVerticalAlignmentMiddle, creator.CellVerticalAlignmentMiddle and creator.CellVerticalAlignmentMiddle which is used when calling the drawCell function in 156-158 and also in the loop in lines 161-168.
3. Content wrapping
This example shows how a text wraps into multiple lines when the cell size doesn’t fit a given text in a single line. This can be seen in the example code in lines 173-220 which is inside the function contentWrapping.
4. Content Overflow
When the text content doesn’t fit inside a table cell it can overflow. In the content overflow section of the example code it shows how to set the behavior of an overflowing text. It can be made either visible or hidden. This is done by setting SetTextOverflow method of the StyledParagraph object. This can be shown in lines 258-267 where the drawCell function is used to draw cells and their contents.
The possible values that are used to set the behavior of an overflowing content are creator.TextOverflowHidden and creator.TextOverflowVisible. Their effect is, as their names indicate, making the overflowing text hidden and visible respectively. If wrapping is enabled by using SetEnableWrap method, the content is wrapped over multiple lines without being truncated.
Run the code
To create the example document run the code using the following command.
go run pdf_tables_simple.go
Sample output