Getting Started
This guide takes you from an empty directory to three working programs, one for each format UniOffice handles. It should take a few minutes.
Everything here builds documents from scratch, which is the clearest way to see how the API fits together. Filling a prepared template is the other common approach and is covered in the guides once you have the basics working.
What you’ll learn
- Get an API key and load it
- Create the project and install the library
- Create your first Word document
- Create your first Excel document
- Create your first PowerPoint document
Prerequisites
- Have Go 1.25+ installed.
- A Linux, macOS or Windows machine.
- Familiarity with Golang. No worries, you don’t have to be an expert.
- Familiarity with using the command line.
Golang Version Compatibility
We are committed to providing the best experience for our users. As of now, we actively support the three latest versions of Go programming language. This ensures that you can leverage the latest features, enhancements, and security updates.
Current Supported Versions:
- Go 1.27
- Go 1.26
- Go 1.25
Create a UniCloud account
UniOffice will not run without a license key. Every program you write with it loads one before touching the library, so this is the first thing to set up rather than something to come back to.
Sign up for a UniCloud account to get your API key. There are two types of license you can use.
- Online license (API key). The metered license is the most convenient way to get started, and the free tier is enough to work through this guide.
- Offline license. Cryptography-based, carrying full signed information that is verified without any outbound connection, hence the name. This suits users shipping OEM products to their own customers, or environments where a firewall or compliance rule forbids outbound calls.
This guide uses the online metered API key.
Navigate to UniCloud and create an account for a 30-day free trial.
Check your inbox for an activation email from UniDoc. Copy the code and paste it into the browser to activate your account.
Generate an API key
Once your account exists, sign in to the Developer Dashboard.
Select API Key, then click +Add API Key.
Enter a descriptive name and click Save. Copy the generated key straight away, because it is shown only once.
If you lose a key you cannot recover it, but you can always create another.
Set up your local development environment
Create a project directory
Create a directory named unioffice-getting-started
mkdir unioffice-getting-startedThen, navigate into it.
cd unioffice-getting-startedInitialize a Go module/project.
go mod init unioffice-getting-startedInstall the UniOffice SDK
Our UniOffice SDK is hosted on this Github repository. To install the Go SDK and its dependencies, run this command.
go get github.com/unidoc/unioffice/v2The /v2 suffix is required. Without it Go resolves the v1 module, and the
library exits with Build information missing - Exiting the first time you run
it. See Build information missing error
if you hit that.
Load the license API key
UniOffice authenticates every request with a valid API key. For development we recommend putting it in an environment variable, which is what every example in the guides reads.
Linux/Mac
export UNIDOC_LICENSE_API_KEY=PUT_YOUR_API_KEY_HEREWindows
set UNIDOC_LICENSE_API_KEY=PUT_YOUR_API_KEY_HERESetting the variable is not enough on its own. The library reads it only when
your program asks it to, so every UniOffice program starts by loading the key,
conventionally in an init function:
import "github.com/unidoc/unioffice/v2/common/license"

func init() {
    err := license.SetMeteredKey(os.Getenv(`UNIDOC_LICENSE_API_KEY`))
    if err != nil {
        panic(err)
    }
}
That block appears at the top of every example in the guides, which
is why they do not repeat the explanation. If you are using an offline license
instead, license.SetLicenseKey takes the key content and your customer name in
place of SetMeteredKey.
Converting a document to PDF is the one case that needs a second key, because the
conversion runs through UniPDF. Those examples call SetMeteredKey twice, once
from each library’s license package.
Create your first Word Document
Let’s see the UniOffice SDK in action.
Import the SDK
Go ahead and create a file named first_word_document.go.
Import the necessary packages from the SDK into your project.
package main

import (
	"os"

	"github.com/unidoc/unioffice/v2/color"
	"github.com/unidoc/unioffice/v2/common/license"
	"github.com/unidoc/unioffice/v2/document"
	"github.com/unidoc/unioffice/v2/measurement"
	"github.com/unidoc/unioffice/v2/schema/soo/wml"
)- The color package facilitates color management, allowing you to work with different color models (RGB, CMYK, etc.) and apply colors to various elements like text, shapes, and backgrounds in documents.
- The license package is included in every call to the SDK to authenticate your request with a valid license key.
- The document package is the core of UniOffice, enabling you to create, modify, and work with Word documents programmatically. It allows you to add text, images, tables, apply styles, and manage properties seamlessly.
- The measurement package facilitates handling units of measurement, ensuring consistency in managing lengths, dimensions, and other measurement-related tasks across documents.
- The wml package is the generated WordprocessingML schema. You reach for it when the typed API needs a schema enum, such as a border or alignment constant.
Run the sample code
Add the following lines of code to the first_word_document.go file after the import block.
func init() {
   // Make sure to load your metered License API key prior to using the library.
   // If you need a key, you can sign up and create a free one at https://cloud.unidoc.io
   err := license.SetMeteredKey(os.Getenv(`UNIDOC_LICENSE_API_KEY`))
   if err != nil {
       panic(err)
   }
}

func main() {
	doc := document.New()
	defer doc.Close()

	// Title
	para := doc.AddParagraph()
	para.SetStyle("Title")
	run := para.AddRun()
	run.Properties().SetBold(true)
	run.Properties().SetColor(color.Blue)
	run.AddText("My first Word document")

	// Heading
	para = doc.AddParagraph()
	para.SetStyle("Heading1")
	run = para.AddRun()
	run.Properties().SetOutline(true)
	run.AddText("Using UniOffice")

    // Line breaks
	run.AddBreak()

	// Paragraph
	para = doc.AddParagraph()
	run = para.AddRun()
	run.Properties().SetFontFamily("Courier")
	run.Properties().SetSize(10)
	run.AddText("Unioffice is a powerful Go library that simplifies the creation and editing of documents in Word, Excel, and PowerPoint formats." +
		"Thanks to UniOffice, 	you can create, generate, and edit any of these formats quickly and intuitively," +
		"while also benefiting from automated processing of these files.")

	run.AddBreak()
	run.AddBreak()

	run.AddText("Moreover, Unioffice provides security measures, ensuring the confidentiality and integrity of your sensitive documents.")

  	run.AddBreak()
	run.AddBreak()

	run.AddText("Here is an example table:")

	// Table
	{
		table := doc.AddTable()

		// Width of the page
		table.Properties().SetWidthPercent(100)

		// With thick borers
		borders := table.Properties().Borders()
		borders.SetAll(wml.ST_BorderSingle, color.Auto, 1*measurement.Point)

		row := table.AddRow()
		row.AddCell().AddParagraph().AddRun().AddText("Header")
		row.AddCell().AddParagraph().AddRun().AddText("Header")
		row.AddCell().AddParagraph().AddRun().AddText("Header")
		row.AddCell().AddParagraph().AddRun().AddText("Header")

		row = table.AddRow()
		row.AddCell().AddParagraph().AddRun().AddText("Cell")
		row.AddCell().AddParagraph().AddRun().AddText("Cell")
		row.AddCell().AddParagraph().AddRun().AddText("Cell")
		row.AddCell().AddParagraph().AddRun().AddText("Cell")

		row = table.AddRow()
		row.AddCell().AddParagraph().AddRun().AddText("Cell")
		row.AddCell().AddParagraph().AddRun().AddText("Cell")
		row.AddCell().AddParagraph().AddRun().AddText("Cell")
		row.AddCell().AddParagraph().AddRun().AddText("Cell")
	}

	// Second Paragraph
	para2 := doc.AddParagraph()
	run2 := para2.AddRun()

	// We can copy the characteristics of other runs.
	run2.SetProperties(run.Properties())
	run2.Properties().SetSize(12)
	run2.AddBreak()
	run2.AddText("UniOffice offers endless possibilities. Customize font styles, create tables, add images, and edit existing files with ease." +
		"Experience remarkable document manipulation and elevate your editing capabilities to new heights. Unleash the full potential of UniOffice today. ")

	doc.SaveToFile("word_document.docx")
}
In this code, function init loads your license API Key from the environment variable you set earlier.
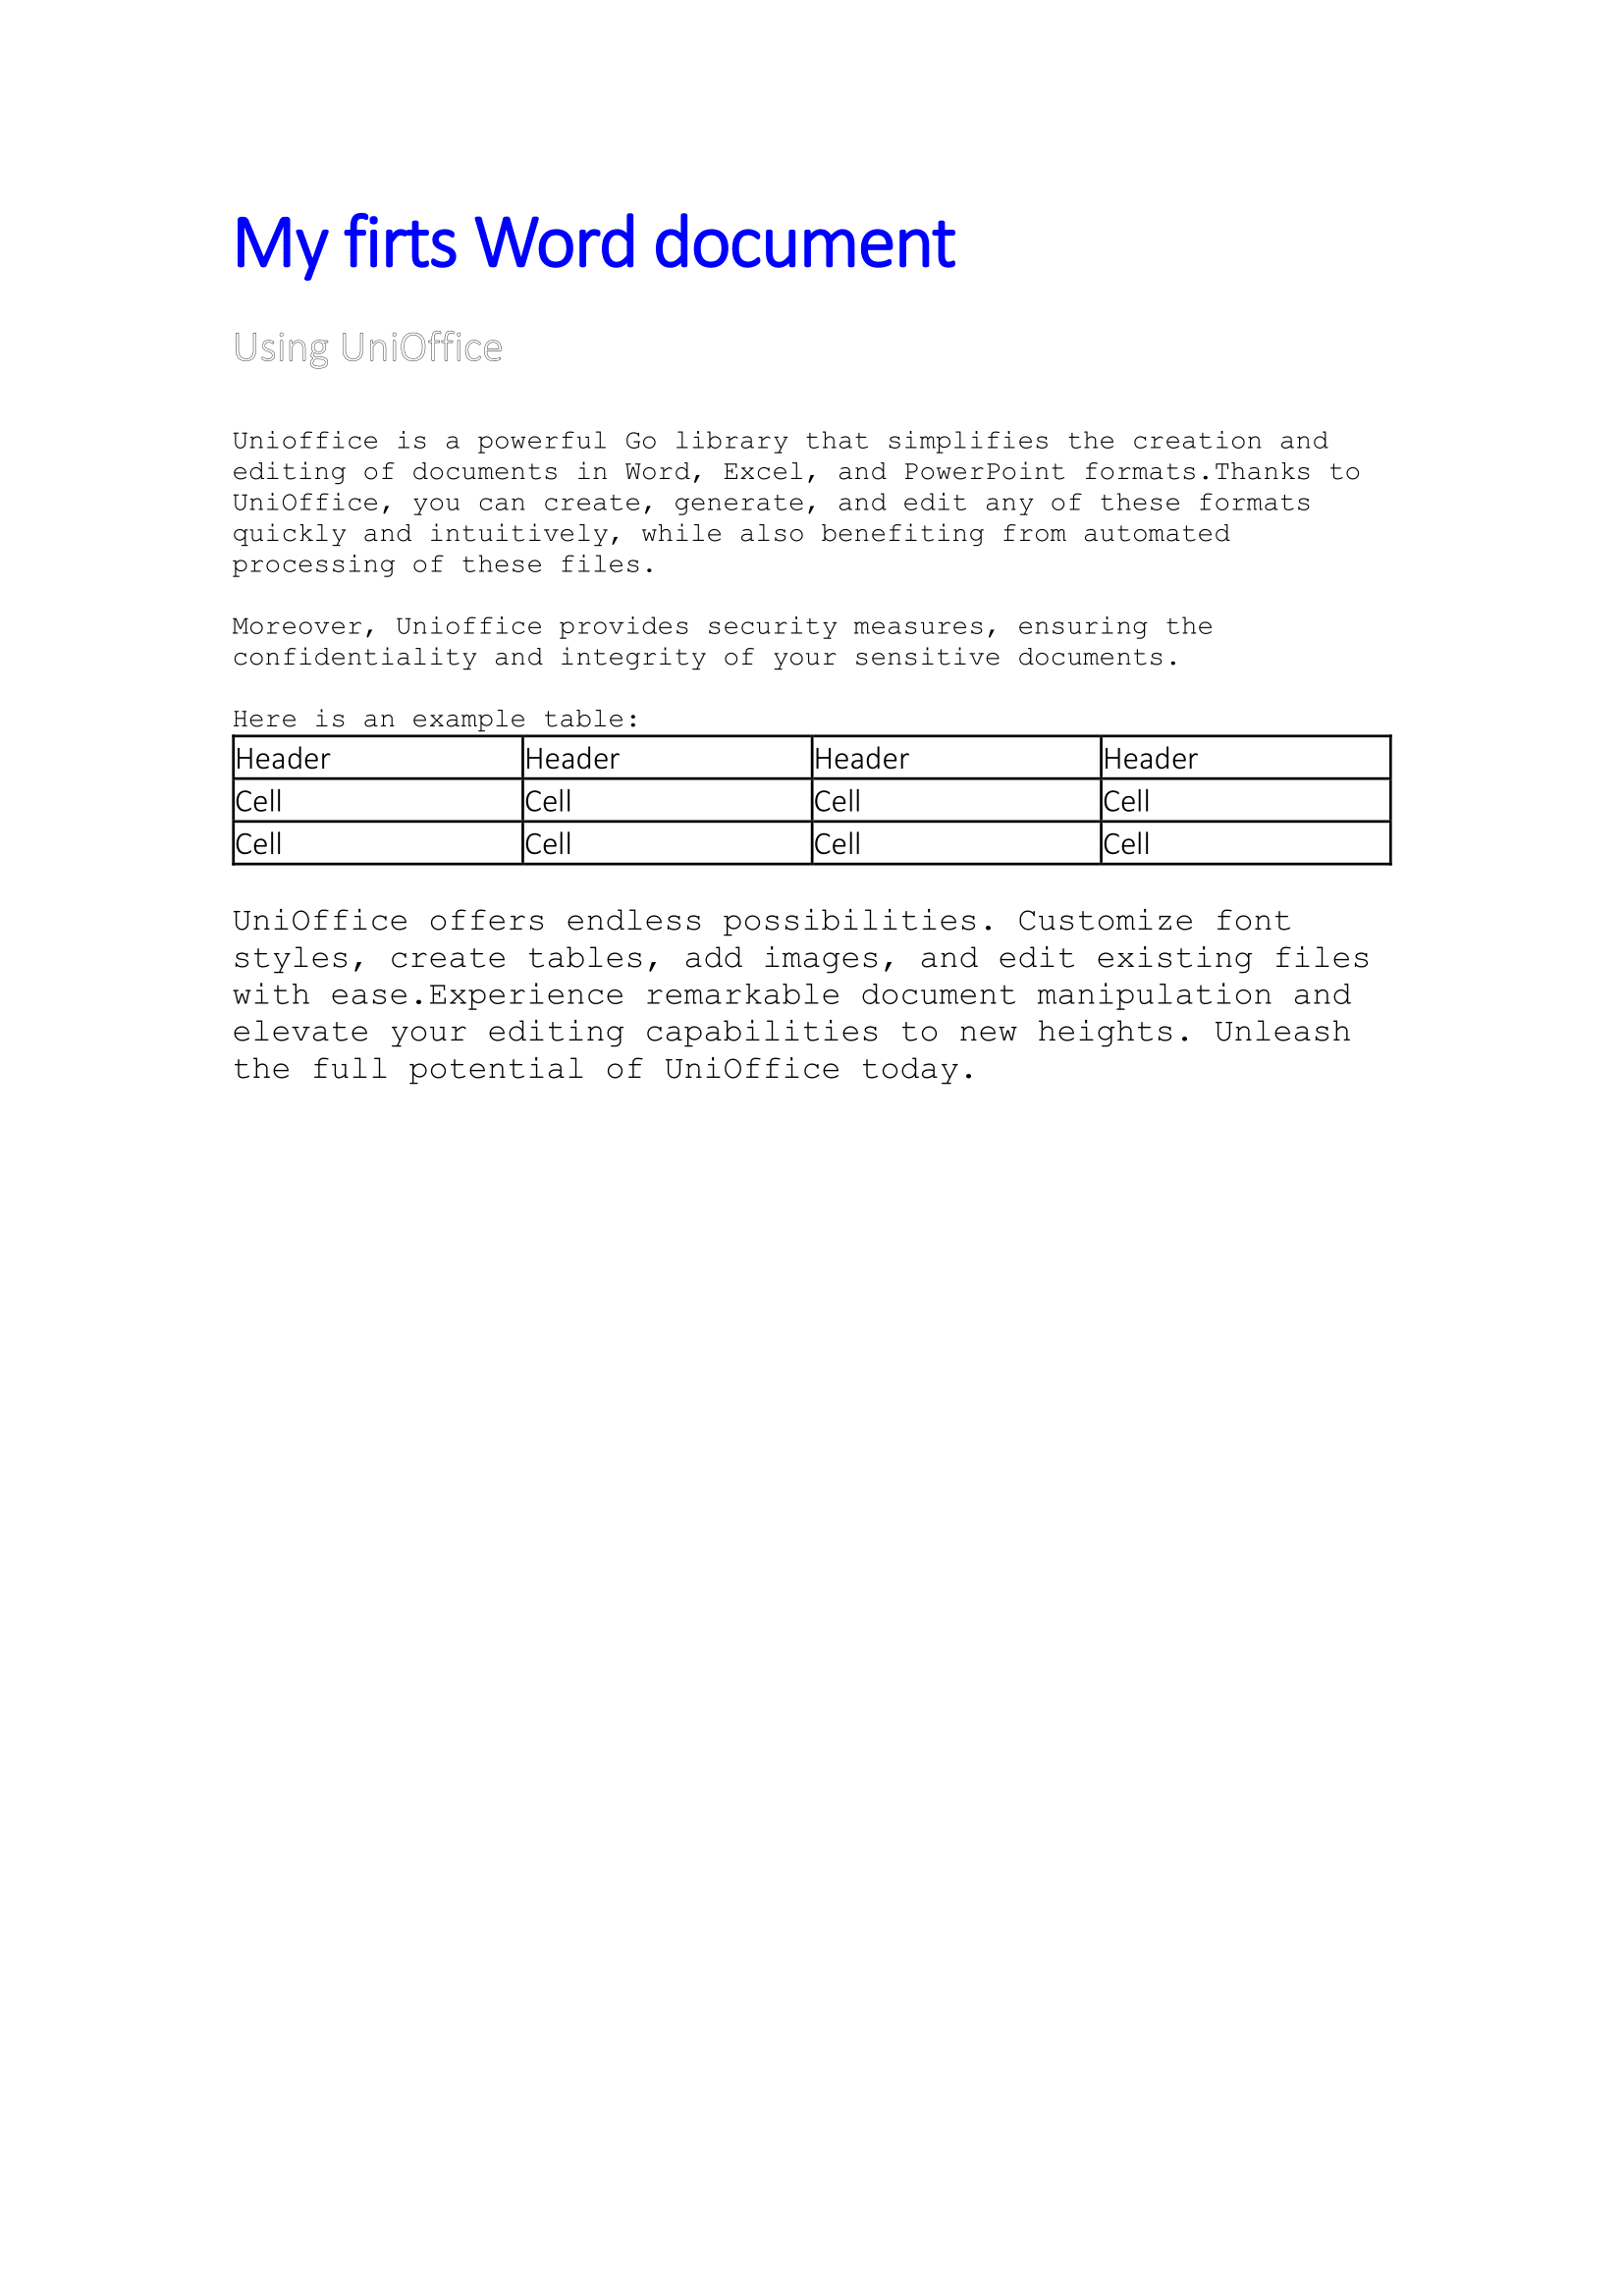
In the main function, a page is created with a title, heading, paragraphs, and a table, each styled differently and with appropriate line breaks. The resulting document is then saved to a file named word_document.docx.
Note:
You are likely to see red lines underneath the code because some packages are yet to be installed.
To fix this, run go mod tidy to install the missing dependencies.
Save and run the file.
go run first_word_document.goThe created Word Document will be added to your project directory. Open the word_document in any Word Document viewer. You should see a one-paged Word like this.
Don’t have the time to set things up locally? Run the code in our online playground.
Create your first Excel Document
Let’s see the case for the creation of an excel document
Import the SDK
Go ahead and create a file named first_excel_document.go.
Import the necessary packages from the SDK into your project.
package main

import (
	"fmt"
	"os"

	"github.com/unidoc/unioffice/v2/color"
	"github.com/unidoc/unioffice/v2/common/license"
	"github.com/unidoc/unioffice/v2/schema/soo/sml"
	"github.com/unidoc/unioffice/v2/spreadsheet"
)
The fmt package is imported to enable the formatting of strings and numbers used for generating the product data and formulas in the spreadsheet.
The spreadsheet package provides functions to add sheets, rows, and cells, as well as to set values, formulas, and formatting for the cells. Additionally, it allows the creation of charts and the customization of various spreadsheet elements.
Run the sample code
Add the following lines of code to the first_excel_document.go file after the import block.
func init() {
   // Make sure to load your metered License API key prior to using the library.
   // If you need a key, you can sign up and create a free one at https://cloud.unidoc.io
   err := license.SetMeteredKey(os.Getenv(`UNIDOC_LICENSE_API_KEY`))
   if err != nil {
       panic(err)
   }
}

func main() {
	// Create a new spreadsheet and ensure it's closed when the function finishes
	ss := spreadsheet.New()
	defer ss.Close()

	// Add a new sheet to the spreadsheet
	sheet := ss.AddSheet()

	// Add a row and a cell to the sheet to display the title
	row := sheet.AddRow()
	cell := row.AddCell()
	rt := cell.SetRichTextString()
	run := rt.AddRun()
	run.SetText("My first Excel Document")
	run.SetBold(true)
	run.SetColor(color.Blue)

	// Set the width of the 5th column to 3 inches
	sheet.Column(5).SetWidth(3 * measurement.Inch)

	// Create headers for the data
	row = sheet.AddRow()
	row.AddCell().SetString("Item")
	row.AddCell().SetString("Price")
	row.AddCell().SetString("Sold")
	row.AddCell().SetString("Total")

	// Create data rows
	for r := 0; r < 5; r++ {
		row = sheet.AddRow()
		row.AddCell().SetString(fmt.Sprintf("Product %d", r+1))
		row.AddCell().SetNumber(1.23 * float64(r+1))
		row.AddCell().SetNumber(float64(r%3 + 1))
		row.AddCell().SetFormulaRaw(fmt.Sprintf("C%d*B%d", r+3, r+3))
	}

	// Set borders for the data range
	bAll := ss.StyleSheet.AddBorder()
	bAll.SetLeft(sml.ST_BorderStyleThin, color.Blue)
	bAll.SetRight(sml.ST_BorderStyleThin, color.Blue)
	bAll.SetTop(sml.ST_BorderStyleThin, color.Blue)
	bAll.SetBottom(sml.ST_BorderStyleThin, color.Blue)
	sheet.SetBorder("A2:D7", bAll)

	// Add a comment to cell D1
	sheet.Comments().AddCommentWithStyle("D1", "Gopher", "This is a different comment.")

	// Create a drawing to hold the chart
	dwng := ss.AddDrawing()
	chart, anc := dwng.AddChart(spreadsheet.AnchorTypeTwoCell)
	anc.SetWidthCells(10)

	// Add a bar chart to the drawing
	lc := chart.AddBarChart()

	// Add data series for the chart
	priceSeries := lc.AddSeries()
	priceSeries.SetText("Price")
	priceSeries.CategoryAxis().SetLabelReference(`'Sheet 1'!A3:A7`)
	priceSeries.Values().SetReference(`'Sheet 1'!B3:B7`)

	soldSeries := lc.AddSeries()
	soldSeries.SetText("Sold")
	soldSeries.Values().SetReference(`'Sheet 1'!C3:C7`)

	totalSeries := lc.AddSeries()
	totalSeries.SetText("Total")
	totalSeries.Values().SetReference(`'Sheet 1'!D3:D7`)

	// Add category and value axes to the chart
	ca := chart.AddCategoryAxis()
	va := chart.AddValueAxis()
	lc.AddAxis(ca)
	lc.AddAxis(va)
	ca.SetCrosses(va)
	va.SetCrosses(ca)

	// Add a title and legend to the chart
	title := chart.AddTitle()
	title.SetText("Items Sold")
	chart.AddLegend()

	// Add the chart to the sheet
	sheet.SetDrawing(dwng)

	// Save the spreadsheet to a file named "excel_document.xlsx"
	ss.SaveToFile("excel_document.xlsx")
}
In this code, function init loads your license API Key from the environment variable you set earlier.
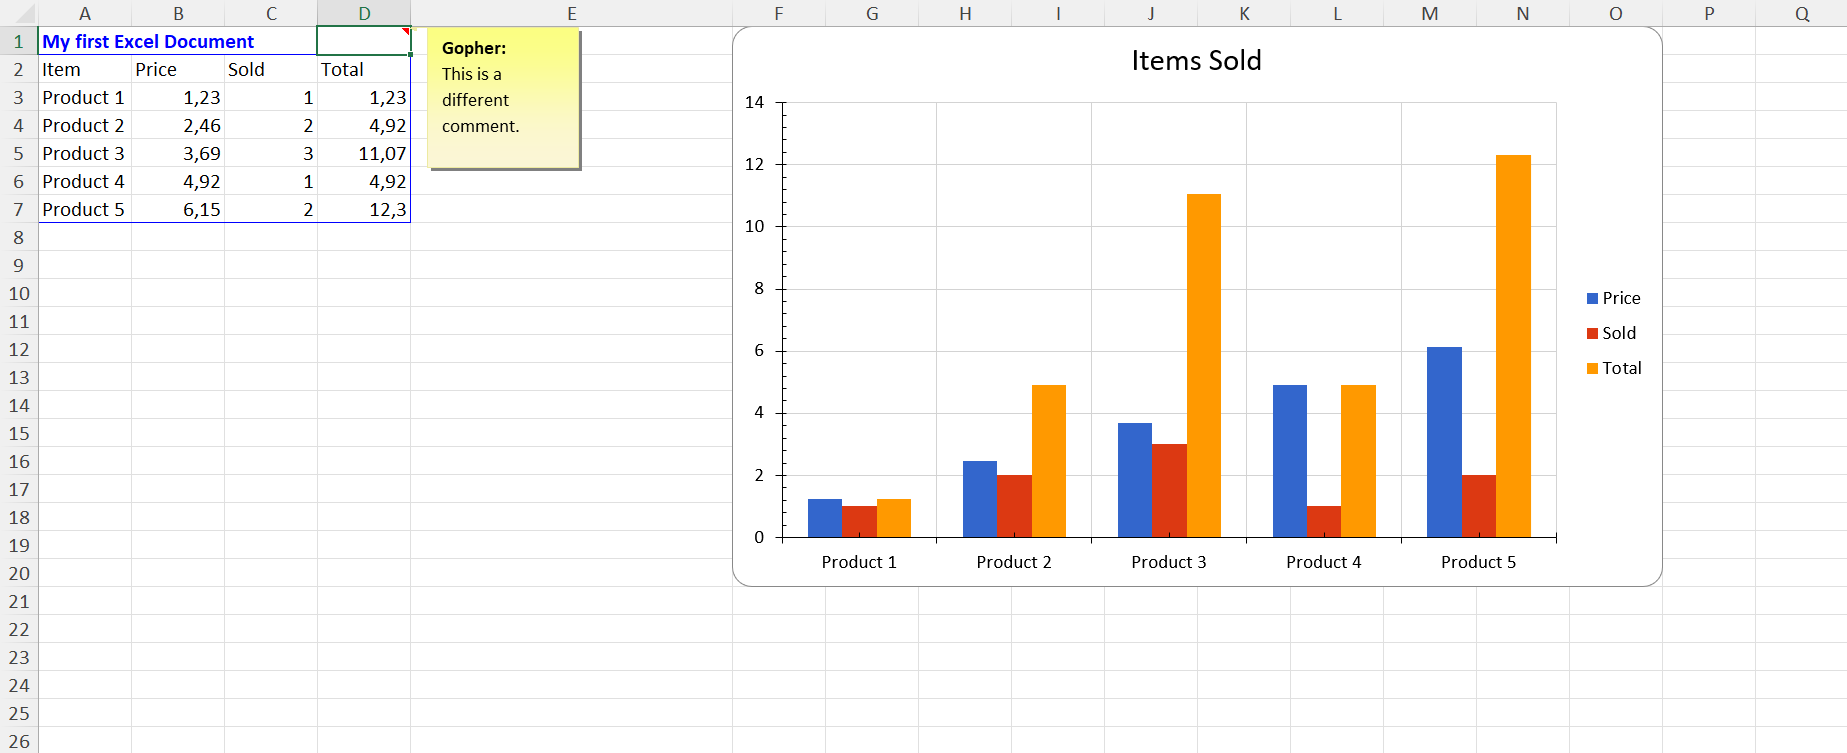
In the main function, a new Excel spreadsheet is created, a row is created for the document title, and then another row is created as a header for a table with the titles “Item”, “Price”, “No. Sold” and “Total”. Dummy data from the table, including name, price, quantity sold, and total, is entered into the spreadsheet.
To enhance the appearance of the spreadsheet, a thin blue border style is defined and applied to all cells.
Furthermore, a comment is added to cell D1 of the spreadsheet.
A bar chart is created on a new drawing sheet, representing prices and quantities sold for the products. The chart series are configured to display the appropriate categories and values based on the data in the spreadsheet.
To provide context to the chart, a title and legend are added.
Finally, the Excel document is saved to a file named excel_document.xlsx.
Note:
You are likely to see red lines underneath the code because some packages are yet to be installed.
To fix this, run go mod tidy to install the missing dependencies.
Save and run the file.
go run first_excel_document.goThe created Excel document will be added to your project directory. Open the excel_document.xlsx file in any spreadsheet program. You should see a one-page sheet with data and a corresponding chart.
Don’t have the time to set things up locally? Run the code in our online playground.
Create your first PowerPoint Document
Finally, Let’s see how to create a PowerPoint document.
Import the SDK
Go ahead and create a file named first_powerpoint_document.go.
Import the necessary packages from the SDK into your project.
package main

import (
	"os"

	"github.com/unidoc/unioffice/v2/color"
	"github.com/unidoc/unioffice/v2/common/license"
	"github.com/unidoc/unioffice/v2/measurement"
	"github.com/unidoc/unioffice/v2/presentation"
	"github.com/unidoc/unioffice/v2/schema/soo/dml"
)
The presentations package is used for creating and manipulating PowerPoint presentations. It offers functions to add slides, text boxes, shapes, charts, and other objects to the presentation. Additionally, it enables the customization of various properties, such as font, size, color, and alignment, for these objects.
The dml package contains the elements related to drawing and graphical objects in the PowerPoint presentation. It is used to set properties like the shape type, line properties, and geometry of objects on the slides.
Run the sample code
Add the following lines of code to the first_powerpoint_document.go file after the import block.
func init() {
   // Make sure to load your metered License API key prior to using the library.
   // If you need a key, you can sign up and create a free one at https://cloud.unidoc.io
   err := license.SetMeteredKey(os.Getenv(`UNIDOC_LICENSE_API_KEY`))
   if err != nil {
       panic(err)
   }
}

func main() {
	// Create a new PowerPoint presentation and defer its closing.
	ppt := presentation.New()
	defer ppt.Close()

	// Slide 1: Title Slide
	slide := ppt.AddSlide()

	// Add a centered text box with the title.
	tb := slide.AddTextBox()
	tb.SetTextAnchor(dml.ST_TextAnchoringTypeCtr)

	// Customize the text box appearance.
	tb.Properties().SetGeometry(dml.ST_ShapeTypeChevron)
	tb.Properties().SetFlipHorizontal(true)
	tb.Properties().SetSolidFill(color.LightBlue)
	tb.Properties().LineProperties().SetWidth(0.125 * measurement.Inch)
	tb.Properties().LineProperties().SetSolidFill(color.DarkBlue)
	tb.Properties().SetPosition(1.8*measurement.Inch, 0.5*measurement.Inch)
	tb.Properties().SetWidth(7 * measurement.Inch)

	para := tb.AddParagraph()
	para.Properties().SetAlign(dml.ST_TextAlignTypeCtr)
	run := para.AddRun()
	run.Properties().SetBold(true)
	run.Properties().SetSolidFill(color.Black)
	run.SetText("My First PowerPoint Document!")

	// Add a text box with bullet points.
	tb = slide.AddTextBox()
	tb.SetTextAnchor(dml.ST_TextAnchoringTypeJust)
	tb.Properties().SetPosition(0.5*measurement.Inch, 3.0*measurement.Inch)
	tb.Properties().SetWidth(6 * measurement.Inch)

	// Add bullet points with alternating colors.
	for i := 0; i < 5; i++ {
		para = tb.AddParagraph()
		para.Properties().SetBulletFont("Wingdings")
		para.Properties().SetBulletChar("Ø")
		para.Properties().SetLevel(int32(i))
		run = para.AddRun()
		if i%2 == 1 {
			run.Properties().SetSolidFill(color.DarkRed)
			run.SetText("Red Point")
		} else {
			run.SetText("Black Point")
		}
	}

	// Add another text box with a different color and position.
	tb = slide.AddTextBox()
	tb.Properties().SetSolidFill(color.AliceBlue)
	tb.Properties().LineProperties().SetSolidFill(color.Blue)
	tb.Properties().SetPosition(5*measurement.Inch, 2.5*measurement.Inch)
	para = tb.AddParagraph()
	para.Properties().SetAlign(dml.ST_TextAlignTypeCtr)
	r := para.AddRun()
	r.SetText("TextBox")

	// Slide 2: Description Slide
	slide = ppt.AddSlide()

	// Add a text box for the description.
	tb = slide.AddTextBox()
	tb.Properties().SetPosition(0.5*measurement.Inch, 1.5*measurement.Inch)
	tb.Properties().SetWidth(10 * measurement.Inch)
	para = tb.AddParagraph()
	r = para.AddRun()
	r.SetText("UniOffice Presentation is a powerful and user-friendly software for creating compelling slideshows and presentations. It offers intuitive tools, customizable layouts, and seamless multimedia integration, making it a top choice for all presentation needs.")

	// Save the presentation to a file.
	ppt.SaveToFile("powerpoint_documet.pptx")
}
In this code, function init loads your license API Key from the environment variable you set earlier.
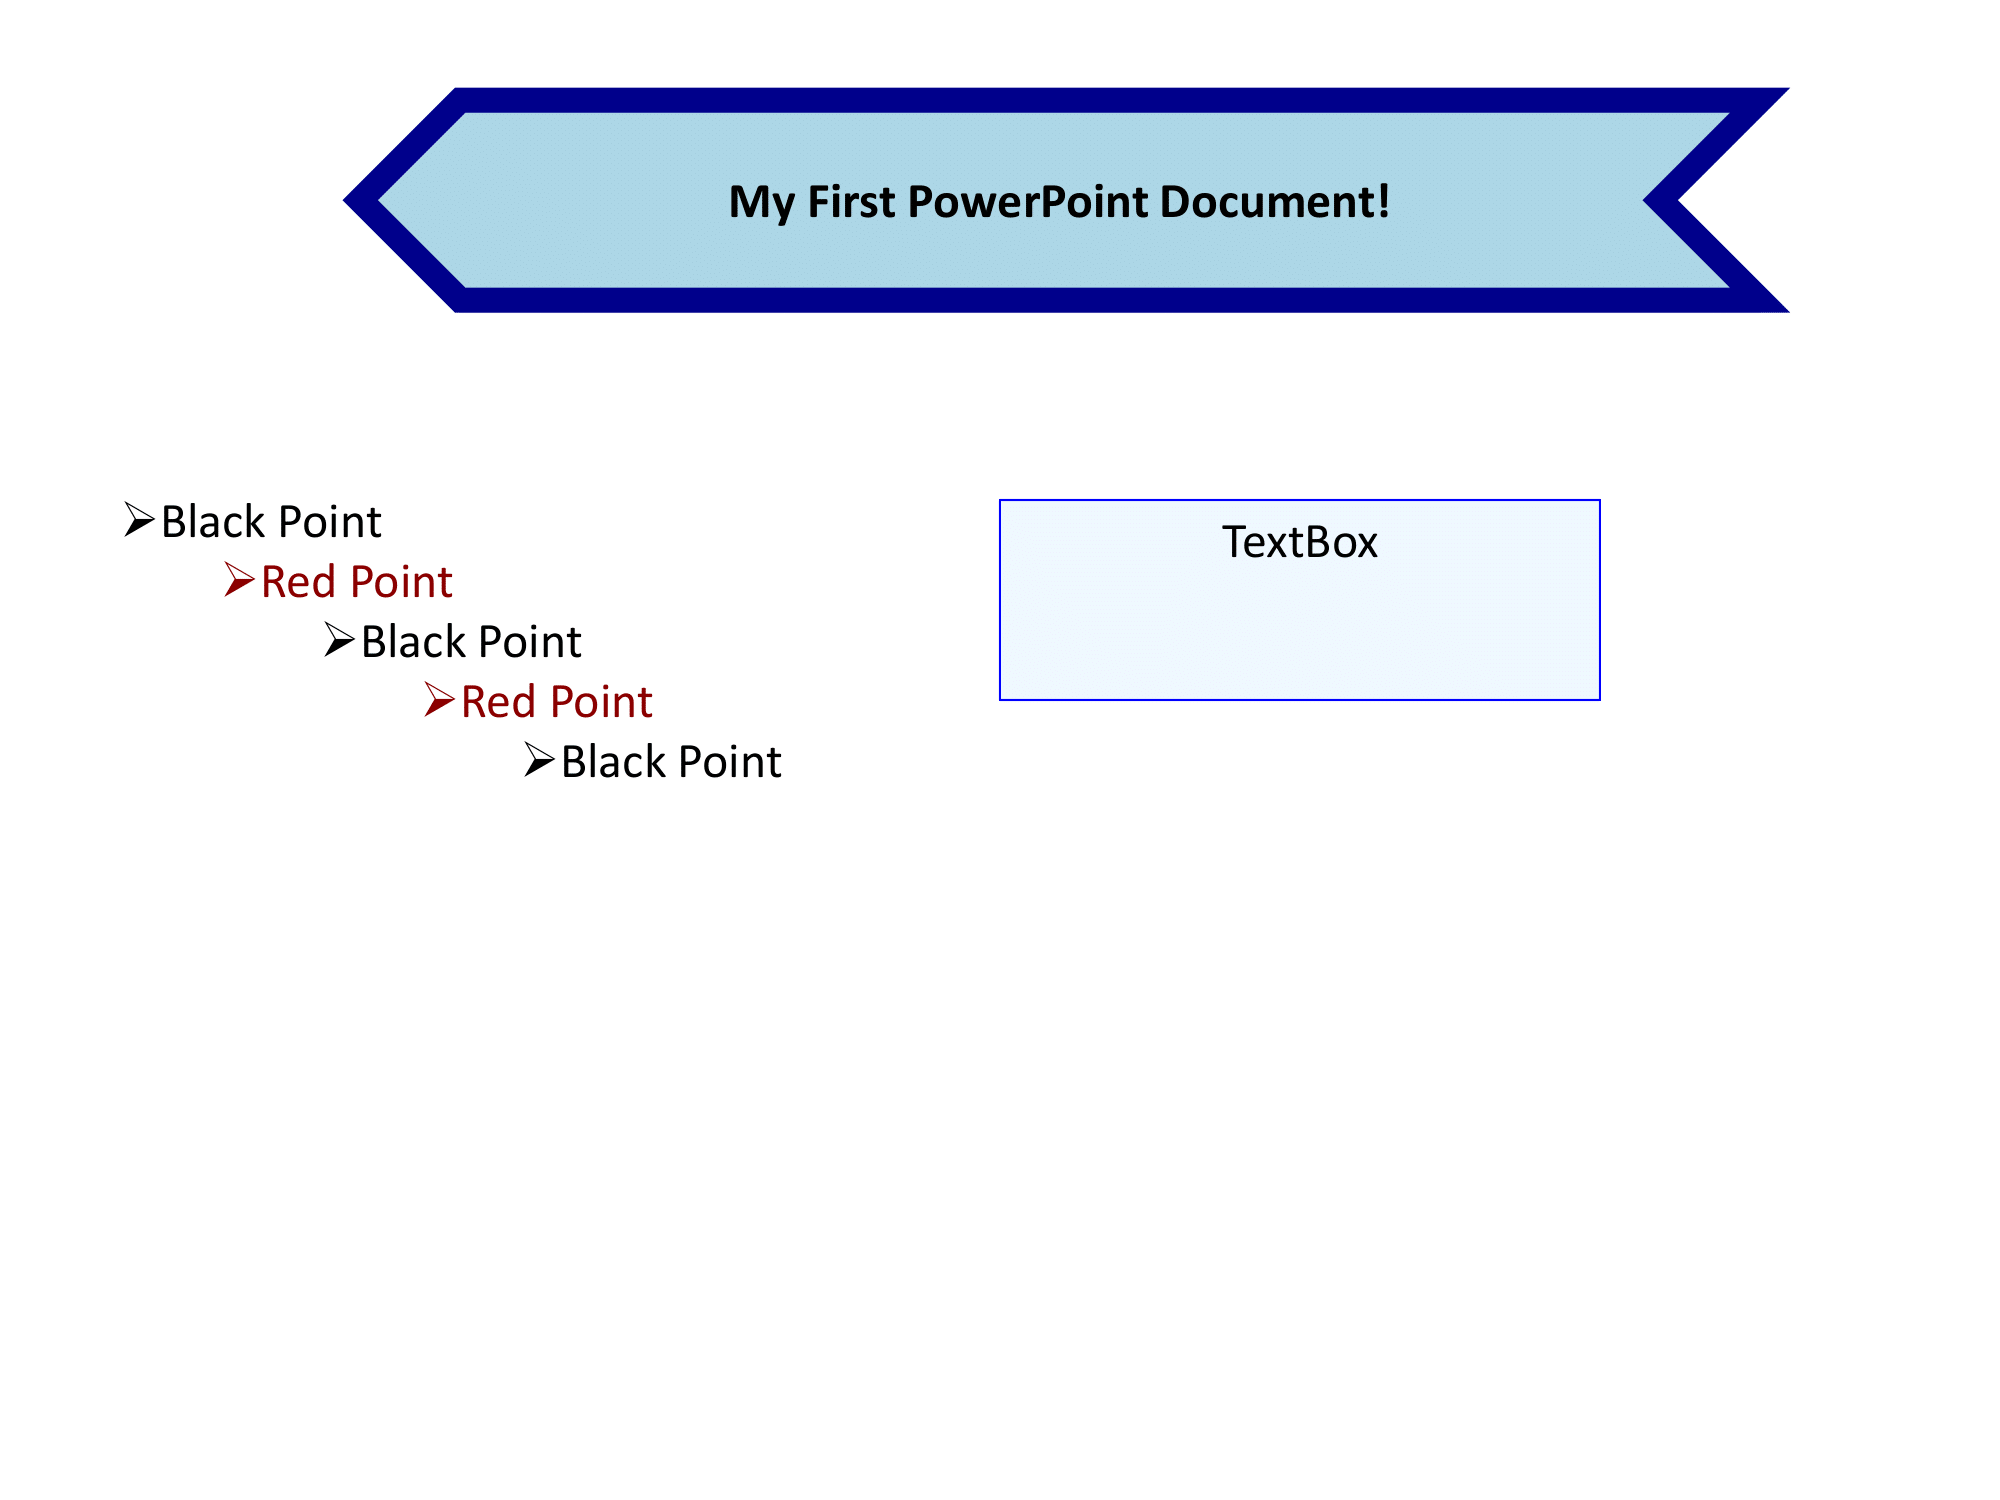
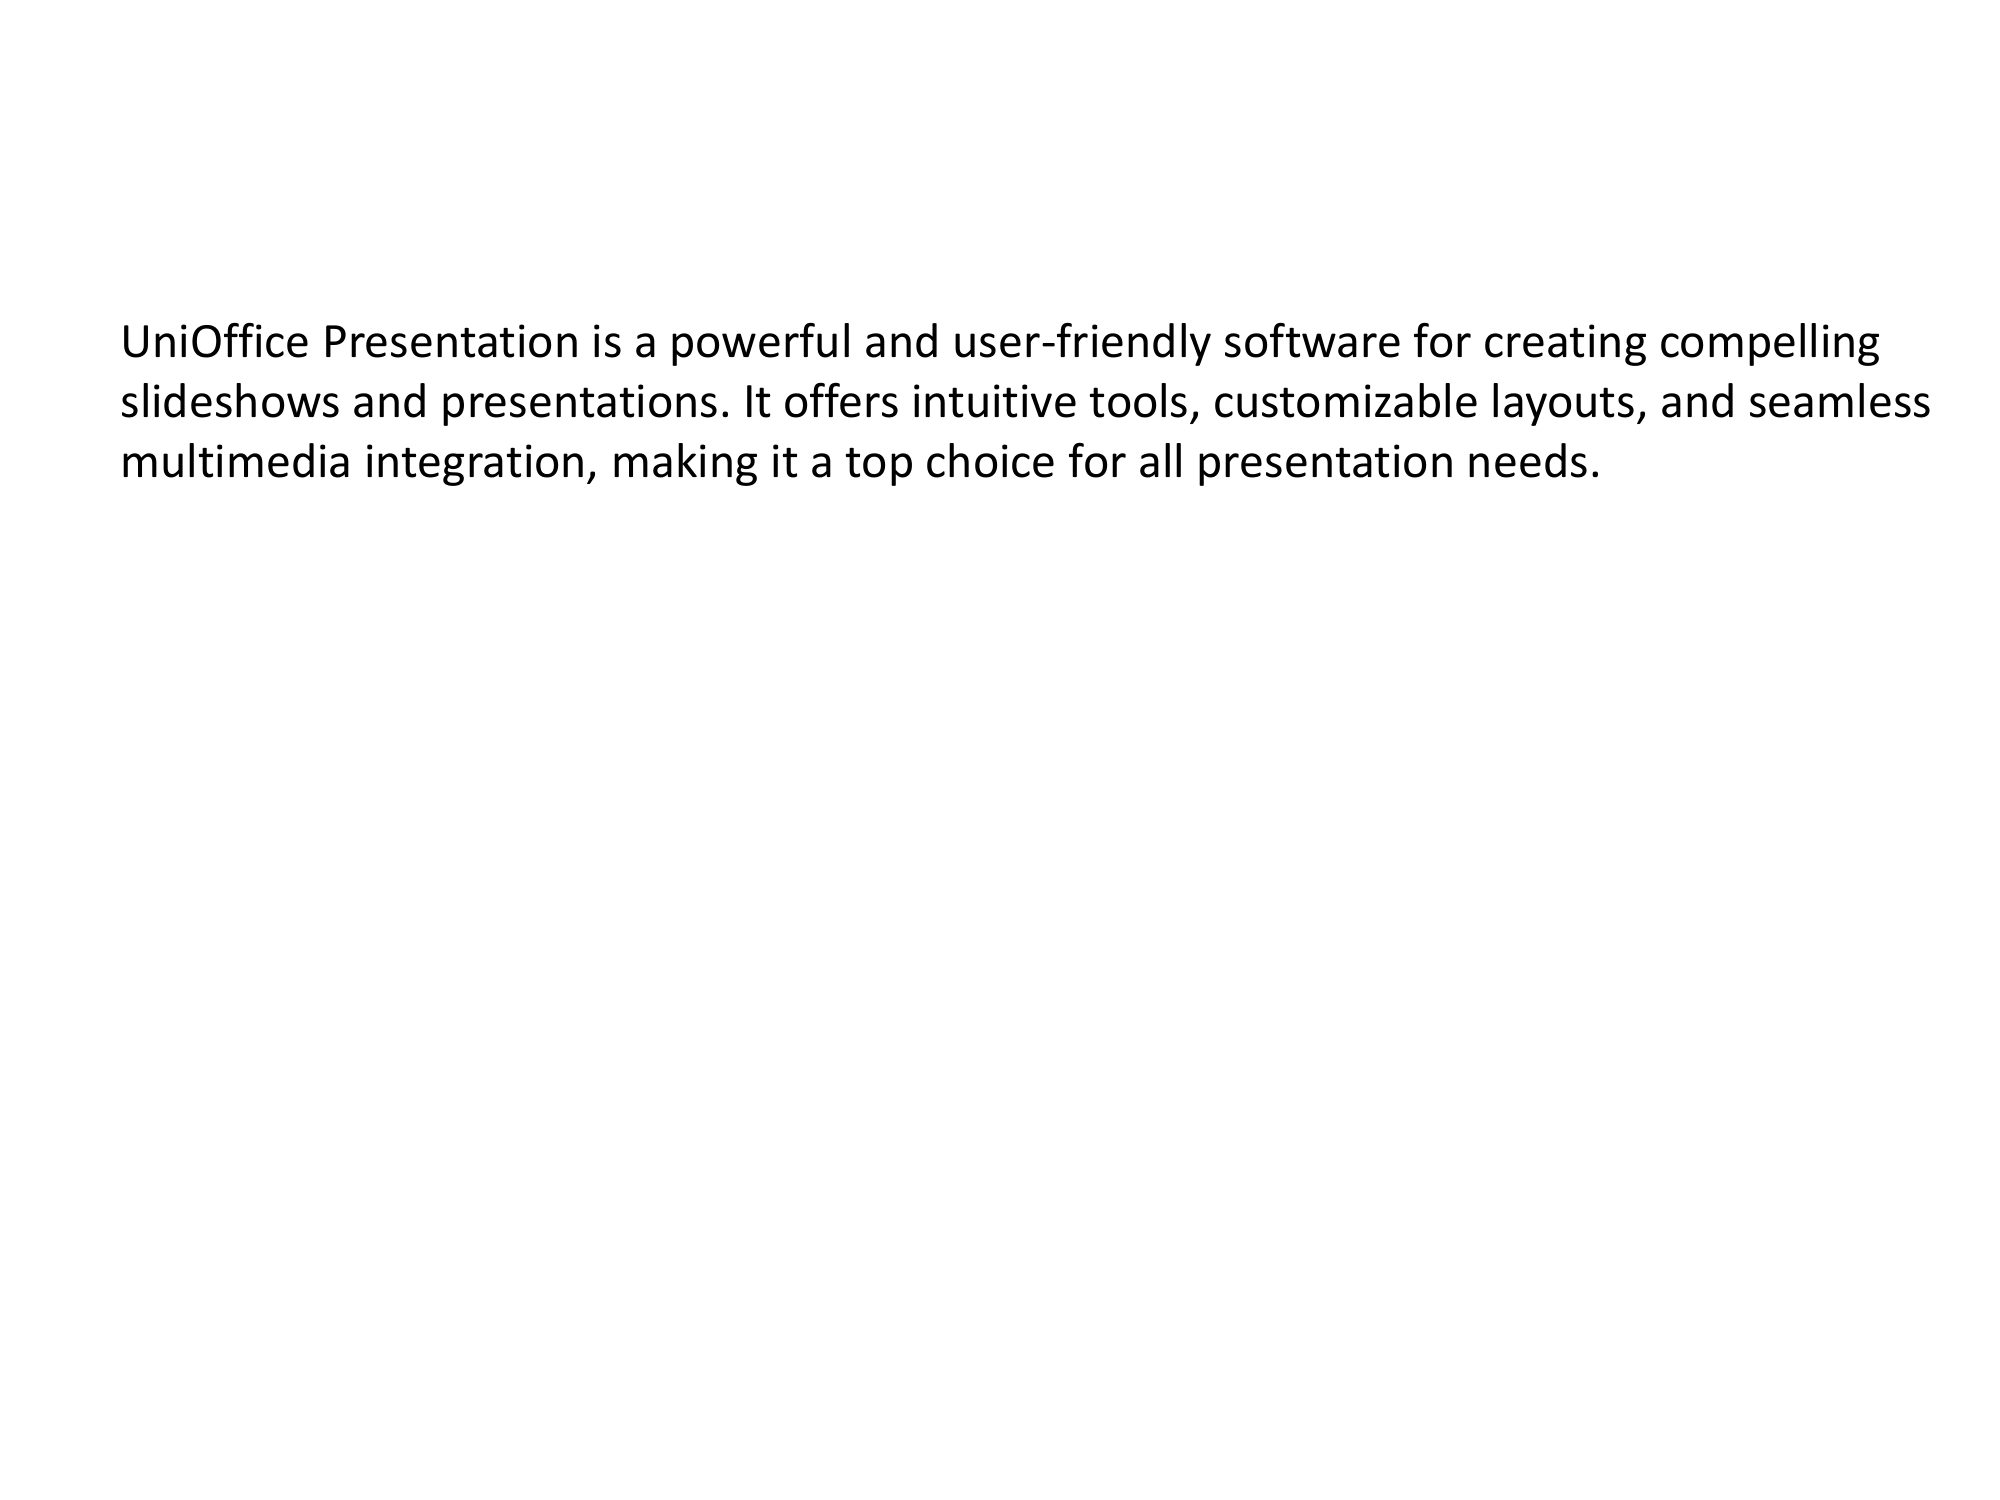
The main function creates a two-slide PowerPoint presentation. The first slide displays an arrow-shaped text box with a light blue background and a bold black title. Additionally, it includes two additional text boxes: one with bullets (red for odd levels and black for even levels) and another one with a centered “TextBox” label. On the second slide, a text box is presented.
Finally, the PowerPoint document is saved to a file named powerpoint_document.pptx.
Note:
You are likely to see red lines underneath the code because some packages are yet to be installed.
To fix this, run go mod tidy to install the missing dependencies.
Save and run the file.
go run first_powerpoint_document.goThe created PowerPoint document will be added to your project directory. Open the powerpoint_document.pptx. You should see 2 slides like the following:
Don’t have the time to set things up locally? Run the code in our online playground.
Next steps
You now have a working setup and one program for each format. Where to go next depends on which one you are building on.
Document guides for Word: text and styles, page layout, tables, images, forms, templates and mail merge, and PDF conversion.
Spreadsheet guides for Excel: cell formatting, formulas and evaluation, charts, and validation.
Presentation guides for PowerPoint: slides, text boxes, tables, images and templates.
FAQ for the questions that come up most, licensing included.
Examples repository is the source every guide embeds, and each guide tells you which directory to run.
API Reference for the full package documentation.